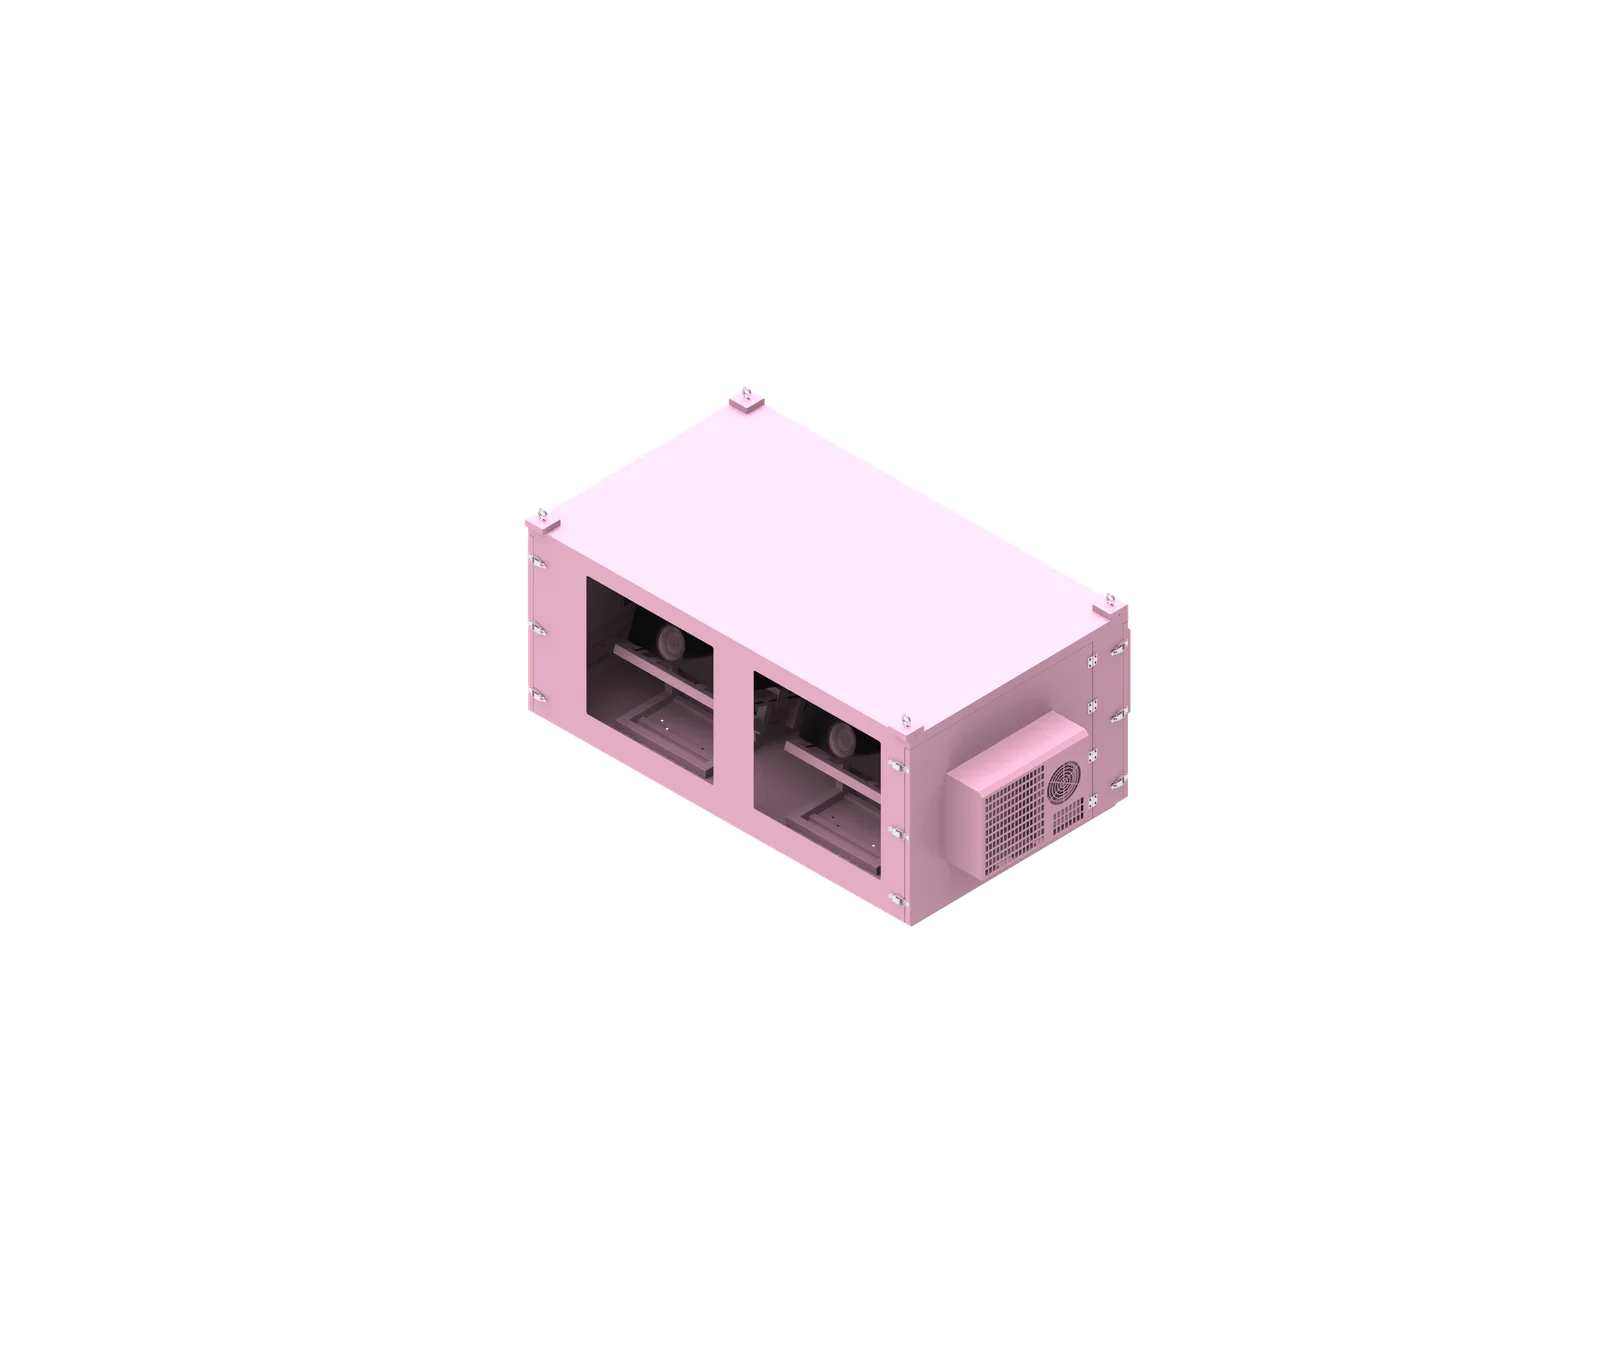
Sizing an outdoor projector enclosure starts with the projector, not with a generic box dimension. The correct enclosure must protect the projector from rain, dust, humidity, insects, heat, cold, and maintenance problems while preserving optical alignment and airflow. ShiRui evaluates the exact projector model, lens position, cooling method, cable routing, mounting structure, and site environment before confirming final enclosure dimensions by engineering drawing.
Video Guide: Explore this outdoor projector housing designed for professional outdoor projection systems. The video shows the enclosure structure and how it supports reliable projector protection for permanent outdoor installations, scenic attractions, commercial spaces, and AV projects.
What is outdoor projector enclosure?
An outdoor projector enclosure is a protective housing designed to let a projector operate outdoors while shielding it from weather, dust, insects, humidity, temperature changes, and physical damage. A properly sized outdoor projector enclosure must also preserve lens alignment, airflow, cable access, cooling performance, and maintenance space for the specific projector model.
Video Guide: Explore this projector waterproof case designed to protect outdoor projection equipment from rain, dust, moisture, and changing weather conditions. The video gives a closer look at the enclosure design for professional outdoor projector installations.
Core Purpose and Engineering Role
An outdoor projector enclosure is not simply a waterproof shell. It is an engineered operating environment for the projector. The enclosure must protect the equipment while allowing the projector to breathe, reject heat, connect to power and signal cables, and project through a correctly aligned optical window.
For ShiRui projects, enclosure sizing is determined by the actual projector configuration, not by lumens alone and not by adding one fixed clearance around every projector.
Key sizing factors include:
- Projector length, width, and height
- Lens center position and lens offset
- Projection direction and projection angle
- Air intake and exhaust locations
- Power consumption and heat output
- Cable and connector positions
- Cable bending space and cable gland locations
- Internal mounting platform
- Cooling system components
- Heating, dehumidification, and sensor layout
- Door opening direction and service access
- Pole, wall, ceiling, ground, or custom frame mounting
ShiRui Pro Tip: I always ask for the projector specification drawing before discussing enclosure size. Two projectors with similar outer dimensions can require very different enclosure layouts if the exhaust, lens, or connector positions are different.
How Does outdoor projector enclosure Work?
An outdoor projector enclosure works by creating a protected internal space around the projector while managing weather sealing, optical transmission, airflow, heat removal, humidity control, power distribution, and maintenance access. The enclosure must allow the projector to operate safely without blocking the lens, intake vents, exhaust vents, connectors, or service points.
Video Guide: Watch the smoke test of our outdoor enclosure for projector applications and see how the enclosure performs during product testing. This video gives AV integrators and project contractors a closer look at the enclosure design and testing process for professional outdoor projection installations.
Protection, Projection, and Environmental Control
A well-designed outdoor projector enclosure works through several coordinated systems. The shell protects the projector from outdoor conditions. The optical window allows the projected image to pass through. The cooling system removes heat. The internal layout keeps airflow, cables, controls, and maintenance access organized.
Based on our internal data and market analysis, here is the breakdown:
| System Area | Function | Sizing Impact |
|---|---|---|
| Enclosure shell | Protects against rain, dust, corrosion, and impact | Adds external thickness, doors, frames, seals, and structural reinforcement |
| Optical window | Aligns with the projector lens and projection angle | Requires accurate lens center positioning and adjustment allowance |
| Cooling system | Removes projector heat and controls internal temperature | Requires fan, filter, air-conditioner, or internal-circulation space |
| Cable area | Houses power, signal, glands, sockets, and control wiring | Requires connector clearance and cable bending space |
| Environmental controls | Supports heating, dehumidification, sensors, alarms, and monitoring | Requires internal layout space and service access |
| Mounting structure | Connects the enclosure to pole, wall, ceiling, ground, or frame | Affects base size, weight distribution, and external dimensions |
ShiRui enclosure options may include galvanized steel, aluminum alloy, 201 stainless steel, or 304 stainless steel. Material thickness may range approximately from 1.2 mm to 4.0 mm depending on size, load, structure, and project conditions. No single material thickness is correct for every enclosure.
ShiRui Pro Tip: I treat the enclosure as a complete operating system, not a metal cabinet. If cooling, optics, cables, and service access are not planned together, the final box may fit the projector physically but fail operationally.
How big should my outdoor projector screen be?
Your outdoor projector screen size should be based on viewing distance, projector throw ratio, image brightness, installation space, and audience layout. Screen size also affects enclosure placement because the projector distance, lens angle, and optical window position must match the required image size and projection geometry.
Video Guide: Explore our outdoor projector enclosure designed for professional outdoor projection installations. This video provides a closer look at the enclosure design and shows how it supports reliable projector protection for long-term outdoor applications.
Screen Size and Enclosure Placement Relationship
Screen size is not only a viewing decision. It also affects where the projector must be installed, how the enclosure is aimed, and how the optical window must align with the lens. A larger screen may require a longer throw distance, a different lens setting, or a more precise enclosure mounting angle.
When sizing the outdoor projector enclosure, screen planning should include:
- Confirm the desired image width and height.
- Check the projector throw ratio and lens zoom range.
- Confirm the throw distance from projector lens to screen.
- Verify the lens center height and projection angle.
- Check whether lens shift or keystone correction is required.
- Align the enclosure optical window with the true lens center.
- Confirm that the enclosure does not obstruct the projection cone.
- Review mounting height, service access, and cable entry direction.
For outdoor applications, the enclosure must maintain projection alignment even after wind, vibration, thermal expansion, and maintenance activity. This is why ShiRui recommends confirming the enclosure drawing before production rather than relying only on approximate site measurements.
ShiRui Pro Tip: I recommend deciding the screen size before finalizing the enclosure bracket or mounting base. If the screen size changes later, the lens angle and optical window position may also need to change.
How to build an outdoor projector enclosure?
To build an outdoor projector enclosure correctly, start with the projector specification drawing, then design the internal space around lens alignment, airflow, cooling components, cables, mounting structure, and maintenance access. Avoid using a universal clearance rule; final internal and external dimensions should be confirmed through a project-specific engineering drawing.
Video Guide: Explore waterproof enclosures for outdoor projectors designed to provide reliable protection for professional projection equipment. This video offers a closer look at enclosure solutions for long-term outdoor installations, AV projects, scenic attractions, and commercial projection applications.
Practical Build Sequence
Building an outdoor projector enclosure requires more than cutting a box to the projector’s dimensions. The enclosure must support long-term outdoor operation, especially when the projector runs for extended hours or is installed in a humid, dusty, hot, cold, or hard-to-access location.
A practical design sequence is:
- Confirm the exact projector model.
- Obtain the projector specification drawing.
- Record projector length, width, and height.
- Confirm lens center position and projection direction.
- Identify air intake and exhaust positions.
- Check power consumption and expected heat load.
- Evaluate ambient temperature, humidity, dust, rain, and operating hours.
- Select fan cooling, air-conditioning, internal circulation, or hybrid cooling.
- Reserve space for cables, connectors, cable bending, sockets, and control boards.
- Confirm the mounting method: pole, wall, ceiling, ground, or custom frame.
- Design the door opening direction and service path.
- Prepare and approve the enclosure drawing before production.
The conceptual sizing formula is:
Internal enclosure space = projector dimensions + airflow clearance + cooling component space + cable and connector space + mounting structure + maintenance access
Final external dimensions must also include the sheet metal structure, doors, frames, sealing components, insulation if required, external air-conditioning components if applicable, and mounting brackets or base structure.
ShiRui Pro Tip: I never approve production from projector dimensions alone. I want the specification sheet, vent positions, connector side, lens center, and site photos before the enclosure drawing is finalized.
Is a 100 inch projector screen too big?
A 100 inch projector screen is not automatically too big for outdoor use, but it must match viewing distance, projector brightness, throw distance, lens capability, and site layout. From an enclosure perspective, the key issue is whether the projector position and optical window alignment can support the required image size.
Video Guide: Explore our waterproof projector box designed for professional outdoor projection projects. This video shows the enclosure design and how it helps protect projector equipment from rain, dust, moisture, and changing outdoor conditions for reliable long-term installations.
When 100 Inches Works Well
A 100 inch outdoor screen can be appropriate for backyard cinema, small events, restaurant patios, hotel gardens, temporary staging, and small-scale projection installations. However, the projector must be able to create a bright, sharp image at the selected throw distance.
The enclosure must then be positioned so the lens projects through the optical glass without clipping the image cone.
Based on our internal data and market analysis, here is the breakdown:
| Evaluation Point | Why It Matters | Enclosure Impact |
|---|---|---|
| Viewing distance | Determines whether 100 inches feels comfortable or oversized | Influences projector placement and mounting height |
| Throw ratio | Determines projector-to-screen distance | Affects enclosure location and optical window angle |
| Lens shift | Helps align the image without tilting excessively | Impacts lens center and adjustment allowance |
| Brightness and ambient light | Outdoor images lose contrast in bright environments | Affects projector selection, not enclosure size alone |
| Mounting position | Controls the projection path and service access | Affects enclosure bracket, base, and door access |
| Projection angle | Prevents image clipping through the window | Requires accurate optical window sizing and alignment |
A 100 inch screen may be too large if the site is too small, the projector cannot produce adequate brightness, or the throw distance forces the enclosure into an unsafe or inaccessible location.
ShiRui Pro Tip: I focus on the lens-to-screen geometry first. If the enclosure is placed only where it is convenient, a 100 inch image may become difficult to align cleanly.
Key Features & Comparison
A high-quality outdoor projector enclosure should combine weather resistance, optical clarity, thermal management, humidity control, secure power distribution, sensor monitoring, and practical service access. The best configuration depends on projector model, heat output, operating environment, cooling method, installation structure, and required maintenance procedures.
Video Guide: Learn about waterproof enclosures for outdoor projectors and how they support professional outdoor projection installations. This video introduces enclosure solutions designed to provide reliable projector protection for long-term outdoor applications.
Feature Comparison for Outdoor Enclosure Design
Based on our internal data and market analysis, here is the breakdown:
| Feature | Typical Purpose | ShiRui Engineering Consideration |
|---|---|---|
| Weatherproof structure | Protects against outdoor rain and moisture | Waterproof design may be specified up to IP65 depending on project requirements |
| Dustproof and anti-mosquito design | Reduces contamination inside the enclosure | Important for outdoor, park, event, and dusty installation sites |
| Optical ultra-white glass | Allows the image to pass through the projection port | Projection port may use optical ultra-white glass with approximately 95% light transmittance |
| Fan cooling | Moves hot air out of the enclosure | Requires fans, filters, airflow channels, and filter maintenance space |
| Air-conditioned cooling | Provides active cooling in demanding environments | Requires extra internal and external space for the air-conditioning unit and service access |
| Internal circulation cooling | Helps in sandy, dusty, humid, or high water-vapor environments | May use air conditioner circulation without special air inlet or fan outlet |
| Heating and dehumidification | Helps control condensation and low-temperature humidity issues | Thermostat box may support waterproof, dustproof, anti-corrosion, heating, and dehumidification functions |
| Anti-fog internal blowing device | Helps keep the projection port clear | Useful where frost, fog, or condensation may affect the glass surface |
| Power socket reservation | Supports projector and internal system power | 10A or 16A multifunctional socket may be reserved depending on project design |
| Sensors and alarms | Monitor operating conditions | Options may include temperature and humidity sensing, road temperature sensing, smoke alarm, and flooding alarm |
| Remote communication | Supports monitoring and control | Options may include WiFi, Ethernet, 4G, and encrypted cloud IoT communication |
| Materials | Balance corrosion resistance, strength, and cost | Options may include galvanized steel, aluminum alloy, 201 stainless steel, or 304 stainless steel |
ShiRui does not recommend selecting features in isolation. Cooling, structure, sealing, power, and access must be coordinated because each feature can change the enclosure size.
ShiRui Pro Tip: I look for conflicts between features. For example, a sealed internal-circulation design cannot be sized like a basic fan-cooled enclosure because the airflow path and cooling components are completely different.
Cost & Buying Factors
The cost of an outdoor projector enclosure depends on size, material, cooling method, sealing level, optical glass, sensors, power layout, mounting structure, quantity, and customization complexity. The projector’s lumen rating may influence project expectations, but it should never be used as the only basis for enclosure size or price.
Video Guide: Take a closer look at our waterproof projector enclosure for professional outdoor installations. This video introduces the enclosure design and shows how it helps protect projection equipment while supporting reliable long-term operation in outdoor environments.
Pricing Factors That Affect Enclosure Selection
Outdoor projector enclosure pricing is project-specific because the enclosure is engineered around the projector and environment. A simple fan-cooled enclosure for a moderate outdoor site is different from an air-conditioned, sealed, sensor-monitored enclosure for dusty, humid, or high-temperature conditions.
Main cost factors include:
- Projector body size and number of projectors
- Single, dual, stacked, or multi-projector layout
- Material selection: galvanized steel, aluminum alloy, 201 stainless steel, or 304 stainless steel
- Material thickness based on enclosure size, load, and structural requirements
- Cooling method: fan, air conditioner, internal circulation, or hybrid system
- Optical glass type and projection window design
- Waterproofing, dustproofing, anti-corrosion, and anti-mosquito requirements
- Heating, dehumidification, and anti-fog components
- Sensors, alarms, control board, and power supply layout
- 10A or 16A socket reservation and cable entry design
- Remote monitoring options such as WiFi, Ethernet, 4G, or cloud IoT connection
- Mounting method and structural support requirements
- Quantity, delivery requirements, and drawing complexity
The best buying process is to compare project-specific drawings and configurations rather than comparing only outside dimensions or projector brightness.
ShiRui Pro Tip: I advise customers to compare quotations by configuration, not just price. Two enclosures may look similar outside, but one may include proper cooling, service access, sensors, and sealed cable entry while the other does not.
Why You Should Not Size an Enclosure by Lumens Alone
Projector lumens describe brightness, not the full enclosure requirement. A 40,000-lumen projector may need a larger and more complex enclosure than a 4,000-lumen model, but lumen output alone does not define lens position, airflow path, connector location, cooling method, mounting structure, or maintenance access.
Video Guide: Learn how to install an outdoor projector enclosure on a pole for professional projection projects. This video demonstrates the basic mounting process and provides a practical reference for AV integrators, contractors, and permanent outdoor projector installations.
Lumens Are Only One Part of the Project
ShiRui project experience includes outdoor projector enclosure configurations for brightness levels ranging approximately from 4,000 to 40,000 lumens. However, brightness is not the sizing formula.
A projector’s enclosure requirement depends on how the machine is physically built and how it operates. Two projectors with similar lumen output may have different external dimensions, different lens locations, different exhaust directions, different connector layouts, and different service requirements.
Important non-lumen sizing factors include:
- Projector length, width, and height
- Lens center height and lens offset
- Projection direction and angle
- Intake and exhaust positions
- Power consumption and heat output
- Connector side and cable bending radius
- Internal mounting platform
- Cooling system type and component space
- Heating and dehumidification requirements
- Door access and projector removal path
- Mounting base, bracket, or support frame
Lumens can help describe the projection application, but they cannot replace a mechanical and thermal layout review.
ShiRui Pro Tip: I use lumens as background information, not as a dimensioning tool. The enclosure drawing must be based on the projector’s physical and thermal design.
Why Fixed Clearance Rules Can Be Misleading
Fixed clearance rules can be misleading because projector models have different airflow paths, lens locations, connector positions, cable requirements, and service needs. Adding the same clearance around every projector may block exhaust, restrict cable bending, misalign the optical window, or make maintenance difficult after installation.
Video Guide: Explore our projector enclosure outdoor solution designed for professional outdoor projection projects. This video gives a closer look at the enclosure design and shows how it supports reliable projector protection for long-term outdoor installations.
Clearance Must Follow the Projector Layout
A universal clearance value may sound convenient, but it can create design errors. A projector with rear exhaust needs a different internal layout from a projector with side exhaust, even if both projectors have similar external dimensions.
Instead of applying one fixed clearance, ShiRui evaluates the real spatial needs around the projector.
Based on our internal data and market analysis, here is the breakdown:
| Clearance Area | What Must Be Checked | Why Fixed Rules Fail |
|---|---|---|
| Front lens area | Lens center, optical window, projection cone, glass distance | A fixed front clearance may not match lens offset or projection angle |
| Rear area | Rear exhaust, power connectors, signal cables | Rear exhaust may need airflow space while another model may need cable space |
| Side area | Side intake, side exhaust, filter access, cable ports | Side vent locations differ widely by projector model |
| Top area | Service access, lifting clearance, internal airflow | Some installations need top removal or adjustment access |
| Bottom area | Mounting plate, feet, rails, vibration isolation | Mounting structure changes the required internal height |
| Door side | Technician access and projector removal | A tight enclosure may fit the projector but prevent removal later |
Clearance should be designed from actual installation, airflow, and maintenance requirements.
ShiRui Pro Tip: I avoid saying “add the same space on every side.” The correct clearance is whatever the projector, airflow, cable routing, and technician access actually require.
How Cooling Method Changes Enclosure Size
Cooling method can significantly change outdoor projector enclosure size because fan systems, air conditioners, sealed internal circulation, and hybrid systems require different airflow paths, component spaces, filters, service access, and sealing strategies. The same projector may need different enclosure dimensions when the cooling configuration changes.
Cooling Configuration and Space Requirements
Cooling is one of the most important reasons enclosure sizes vary. The projector creates heat based on its power consumption and operating condition, while the outdoor environment adds ambient temperature, humidity, dust, rain, and operating-hour challenges.
Based on our internal data and market analysis, here is the breakdown:
| Cooling Method | Main Components | Sizing Effect |
|---|---|---|
| Fan-cooled enclosure | Fans, filters, vents, airflow channels | Requires space for intake, exhaust, filter replacement, and airflow circulation |
| Air-conditioned enclosure | AC unit, internal circulation path, condensate planning, service access | Requires additional internal and external space for the air-conditioning system |
| Fully sealed internal-circulation enclosure | Sealed airflow path, active cooling components, sensors | Often used in sandy, dusty, humid, or water-vapor environments where external air exchange is undesirable |
| Fan + air conditioner hybrid | Ventilation plus active cooling | Requires space for both ventilation components and active cooling equipment |
ShiRui thermostat boxes may include waterproof, dustproof, anti-corrosion, heating, and dehumidification functions. Depending on project configuration, control logic may include heating start and stop conditions based on temperature and humidity, fan operation based on preset temperature ranges, and sensors for temperature, humidity, smoke, flooding, or road temperature.
These functions must be planned into the enclosure layout. They should not be added after the box size has already been fixed.
ShiRui Pro Tip: I confirm the cooling method before finalizing enclosure dimensions. A fan-cooled version and an air-conditioned version for the same projector are often not the same size.
Practical Sizing Workflow
The safest way to size an outdoor projector enclosure is to follow a project-specific workflow: identify the exact projector, study its specification drawing, evaluate optics, airflow, heat, cables, environment, cooling method, mounting structure, and maintenance access, then approve a detailed engineering drawing before production.
Step-by-Step Sizing Process
ShiRui uses a project-based sizing workflow because outdoor projector installations vary widely. A backyard cinema, building projection mapping system, subway project, theme park installation, and roadside projection cabinet may all require different enclosure structures.
Use this workflow:
- Confirm the exact projector model.
- Obtain the projector specification drawing.
- Record projector dimensions.
- Confirm lens center and projection direction.
- Review air intake and exhaust positions.
- Check power consumption and heat load.
- Evaluate the installation environment.
- Select the cooling configuration.
- Reserve cable and maintenance space.
- Confirm mounting structure.
- Prepare the enclosure drawing.
- Approve the drawing before production.
This process prevents common sizing errors, including blocked vents, misaligned projection windows, insufficient cable bending space, inaccessible filters, undersized cooling areas, and doors that cannot open properly after installation.
ShiRui Pro Tip: I recommend freezing the projector model before enclosure design starts. If the projector changes later, the lens position, airflow, cables, and cooling design may all need to be revised.
Customer Information Checklist
To size an outdoor projector enclosure accurately, the customer should provide the projector model, specification sheet, dimensions, lens center, power consumption, number of projectors, projection direction, installation method, temperature range, humidity conditions, operating hours, site photos, and installation drawings before final enclosure design.
Information Needed for Custom Evaluation
Complete information allows the enclosure to be sized around the real projector and real site conditions. Missing data often leads to assumptions, and assumptions can create problems in airflow, projection alignment, waterproofing, maintenance, or mounting.
Please prepare the following:
- Projector brand
- Projector model
- Specification sheet
- Length
- Width
- Height
- Lens center position
- Power consumption
- Number of projectors
- Projection direction
- Installation method
- Maximum ambient temperature
- Minimum ambient temperature
- Humidity conditions
- Daily operating hours
- Required quantity
- Site photos
- Installation drawings
For dual-projector or multi-projector systems, ShiRui does not simply multiply the dimensions of a single enclosure. The design must review projector spacing, lens alignment, individual airflow paths, cooling distribution, internal support structure, cable routing, maintenance access, total weight, and mounting structure.
ShiRui Pro Tip: I can usually give better sizing guidance when customers send photos of the installation site. A drawing shows dimensions, but site photos reveal access, obstacles, mounting limitations, and cable routing realities.
Conclusion
The correct outdoor projector enclosure size must be engineered around the specific projector model, optical path, airflow design, heat load, cooling method, cable layout, maintenance access, and mounting structure. Do not rely on lumens alone, universal clearance values, or standard box dimensions for a custom outdoor installation.
Final Sizing Guidance
A reliable outdoor projector enclosure begins with a complete technical review. The internal dimensions must include the projector body, airflow clearance, cooling component space, cable and connector space, mounting structure, and maintenance access. The external dimensions must also include sheet metal, doors, frames, seals, insulation if required, external cooling equipment, and mounting brackets or base structures.
ShiRui can support single-projector, dual-projector, stacked, and multi-projector outdoor enclosure configurations. Depending on the project, the enclosure may use galvanized steel, aluminum alloy, 201 stainless steel, or 304 stainless steel, with material thickness selected according to enclosure size, structure, load, and environmental requirements.
Before production, final dimensions should always be confirmed through a project-specific engineering drawing.
To request a custom sizing evaluation, send your projector brand and model, specification sheet, length, width, height, lens center position, power consumption, number of projectors, installation method, projection direction, ambient temperature range, humidity conditions, operating hours, site photos, and installation drawings.
ShiRui Pro Tip: If you are unsure where to start, send me the projector model and specification sheet first. From there, we can evaluate the lens, airflow, cooling, cable space, mounting method, and site conditions to recommend a properly sized outdoor projector enclosure.