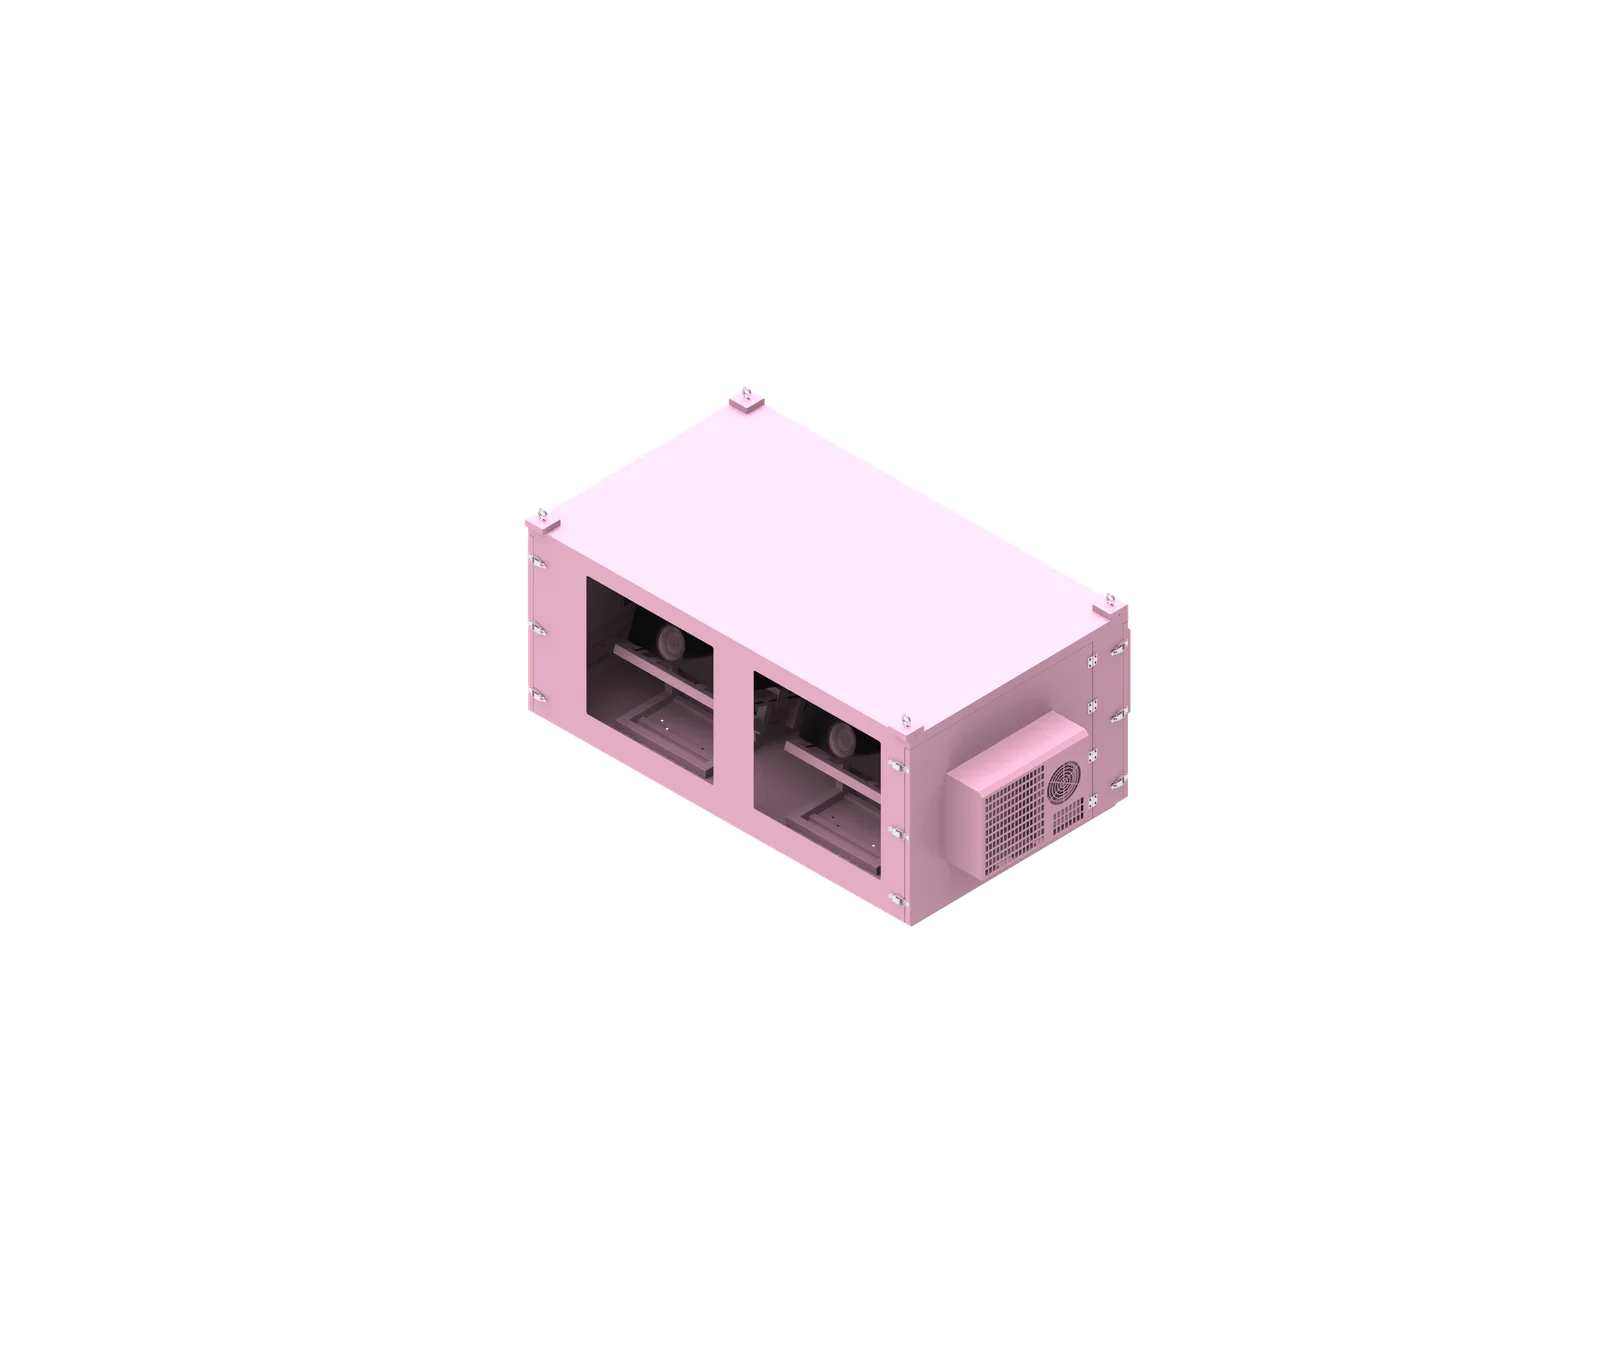
Outdoor projector enclosure installation is the physical mounting, sealing, cabling, and positioning of the housing and projector. Commissioning is the controlled verification that power, cooling, monitoring, optics, and protection functions work in the final installed condition. Handover is the documented transfer of records, open issues, maintenance instructions, and acceptance sign-off to the project owner or operator.
Video Guide: Take a closer look at our outdoor projector enclosure, designed to house projection equipment for outdoor installations.
Based on our internal data and market analysis, here is the breakdown:
| Stage | Check Item | Verification Method | Acceptance Reference | Recorded Result | Pass / Fail / N/A | Corrective Action |
|---|---|---|---|---|---|---|
| Pre-installation | Confirm projector model, lens model, quantity, dimensions, weight, permitted mounting orientation, operating environment, and ventilation requirements | Compare project equipment schedule with the actual projector and lens nameplates and manuals | Project BOM, projector manual, lens manual, approved drawings | |||
| Pre-installation | Confirm enclosure model, adaptation drawing, cooling configuration, power requirement, installation location, exposure condition, and maintenance clearance | Review enclosure documentation and site layout | Enclosure manual, project drawings, approved method statement | |||
| Mounting | Verify support structure, bracket interface, fixing method, enclosure direction, service-door swing, and equipment removal path | Site inspection by qualified personnel; compare with approved design | Structural design, bracket drawings, installation drawings | |||
| Mounting | Confirm structural load, wind load, anchoring, and fastening requirements | Review by qualified structural or installation personnel | Approved project design and local applicable requirements | |||
| Sealing and cable entry | Check door gasket, viewing-window seal, latches, cable glands, unused openings, cable fixing, and drip-loop arrangement where applicable | Visual inspection and fit check | Enclosure manual, approved cable-entry drawing | |||
| Sealing and cable entry | Confirm cable gland compatibility with actual cable diameter and bend space | Measure cable diameter and inspect routing | Cable specification, gland specification, enclosure manual | |||
| Electrical safety | Confirm power supply, protective earthing, circuit protection, and cable configuration | Verification by qualified electrical personnel only | Electrical design, equipment manuals, local applicable requirements | |||
| Electrical safety | Distinguish projector power from enclosure environmental-control power and confirm start/stop logic | Review wiring schedule and system operating instructions | Approved electrical drawings, projector manual, enclosure manual | |||
| Cooling and environment | Check actual intake/exhaust paths, ventilation clearance, sensor positions, fan/air-conditioner/heater/drainage configuration if equipped | Visual inspection and functional check under approved procedure | Enclosure manual, cooling-system manual, project design | |||
| Cooling and environment | Record temperature and humidity with measurement-point descriptions | Log outdoor ambient, projector intake, and other enclosure measurement points as applicable | Test plan, equipment manuals, project acceptance requirements | |||
| Optical alignment | Check lens-to-window relationship, image obstruction, focus, image position, and visible reflection | Test pattern or content check with enclosure in normal operating state | Projector manual, optical design, project display requirements | |||
| Commissioning | Conduct closed-enclosure operation test in final installation configuration | Run representative approved operating modes and record conditions | Approved test plan, equipment manuals, project requirements | |||
| Monitoring and protection | Verify configured alarms, notifications, and recovery procedures without unsafe testing | Use manufacturer-allowed test methods only | Monitoring manual, enclosure manual, approved commissioning procedure | |||
| Handover | Compile installation photos, device list, configuration parameters, test logs, open items, corrective actions, retest records, and maintenance instructions | Document review with installer and client representative | Handover checklist, contract requirements, project acceptance criteria |
What is outdoor projector enclosure installation?
Outdoor projector enclosure installation is the professional process of matching a projector, lens, enclosure, mount, cable entry, cooling arrangement, and service access to the approved project design. It is not simply placing a projector in a weatherproof box; it requires documented checks before mounting, during installation, after power-up, and at handover.
Video Guide: Explore our outdoor projector enclosure, featuring waterproof and dustproof protection, heating, and dehumidification.
Scope of a Professional Installation Checklist
A proper projector enclosure installation checklist separates assumptions from verified facts. Each project should use the actual projector manual, lens manual, enclosure manual, approved drawings, electrical design, and site requirements—not parameters copied from a different model or a previous installation.
Key pre-installation checks include:
- Projector and lens verification
- Projector model and serial number.
- Lens model and throw configuration.
- Quantity of projectors and enclosures.
- Projector dimensions, weight, and permitted mounting orientation.
- Manufacturer-stated environmental and ventilation requirements.
- Enclosure verification
- Enclosure model and applicable adaptation drawings.
- Confirmed cooling type, such as fan-assisted ventilation or air-conditioning if specified.
- Access-door location and maintenance clearance.
- Cable-entry plan and power configuration.
- Exposure conditions such as rain direction, dust, sun load, wind, salt air, or public-access risk.
- Project documentation
- Approved layout drawings.
- Mounting details.
- Electrical design.
- Commissioning test plan.
- Acceptance criteria agreed before installation.
This framework applies to SuiRui discussions as a general installation and commissioning structure. It does not replace the specific SuiRui enclosure documentation, projector manufacturer instructions, approved engineering design, or local applicable electrical and safety requirements.
SuiRui Pro Tip: I always ask the project team to freeze the exact projector model, lens model, enclosure model, and cooling configuration before installation starts. Many site problems begin when a checklist is prepared for one hardware combination but the delivered equipment is slightly different.
How Does outdoor projector enclosure installation Work?
Outdoor projector enclosure installation works by controlling four project risks: physical support, environmental sealing, thermal management, and optical performance. The enclosure must hold the projector in the correct position, protect cable entries and openings, maintain acceptable operating conditions, and allow the projected image to pass through the window without obstruction or unwanted reflection.
Video Guide: Explore our stainless steel outdoor projector housing, customizable to suit your project and installation needs.
Installation Flow from Site Check to Closed-Box Operation
The workflow should move from documentation review to physical installation, then to closed-enclosure commissioning. Skipping directly to image alignment before confirming sealing, cable routing, and cooling can lead to rework.
A practical sequence is:
- Review approved documents
- Confirm the actual projector, lens, enclosure, and cooling configuration.
- Check drawings for mounting position, image geometry, cable routes, and service access.
- Confirm which manuals apply to the exact installed models.
- Inspect the installation location
- Verify that the support structure and bracket interface match the approved design.
- Confirm that qualified personnel have reviewed structural load, wind load, anchoring, and fastening requirements.
- Check that maintenance doors can open and the projector can be removed if future service is needed.
- Install the bracket and enclosure
- Mount the enclosure in the approved orientation.
- Avoid changing hole patterns or adding openings unless approved by the manufacturer and project engineer.
- Confirm enclosure leveling and orientation against the optical design.
- Route and seal cables
- Match cable glands to actual cable diameters.
- Provide strain relief and bend space.
- Seal unused openings as specified.
- Use drip-loop design where applicable and approved.
- Complete electrical verification
- Have qualified electrical personnel confirm supply, grounding, circuit protection, and cable configuration.
- Distinguish projector power from enclosure environmental-control power.
- Do not treat the enclosure fan, heater, air-conditioner, or control circuit as automatically sharing the same operating logic as the projector.
- Commission in the final operating condition
- Close doors as they will be during real operation.
- Run the approved test mode.
- Record outdoor ambient conditions, projector intake temperature, enclosure measurement points, humidity if required, alarms, and abnormal observations.
SuiRui Pro Tip: I prefer to complete the first image check before final cable dressing, then repeat the image check after the enclosure is closed and running normally. The second check is the one that matters for acceptance.
What are the benefits of outdoor projector enclosure installation?
The main benefit of outdoor projector enclosure installation is controlled, repeatable operation in an exposed environment. A correctly installed enclosure supports weather protection, cable management, thermal control, service access, and documented acceptance. For project teams, the real value is fewer assumptions and clearer responsibility between AV, electrical, structural, and maintenance parties.
Video Guide: Explore our outdoor projector enclosure, designed to house projection equipment for outdoor installations.ce.
Practical Benefits for AV Projects
Outdoor projection projects often involve multiple disciplines. A checklist helps each team confirm its own scope without leaving hidden gaps for the next contractor.
Based on our internal data and market analysis, here is the breakdown:
| Benefit Area | What the Installation Checklist Controls | Why It Matters During Acceptance |
|---|---|---|
| Weather exposure | Door seals, viewing-window seals, cable glands, unused openings, and housing orientation | Reduces uncertainty around water, dust, and environmental exposure, subject to the actual enclosure rating and installation method |
| Thermal operation | Intake/exhaust paths, cooling devices, sensor locations, and measurement records | Helps verify that the projector operates in the installed closed-box condition |
| Optical performance | Lens-to-window position, image obstruction, focus, reflection, and final closed-door check | Prevents accepting an image that only works while doors are open or panels are removed |
| Serviceability | Door clearance, projector removal path, cable slack, and access to filters or cooling components where applicable | Allows maintenance without unnecessary dismantling or unsafe workarounds |
| Electrical coordination | Power separation, protective earthing, circuit protection, and qualified electrical verification | Reduces commissioning delays caused by unclear power responsibilities |
| Documentation | Photos, test records, settings, corrective actions, and sign-off records | Creates traceable evidence for handover, maintenance, and future troubleshooting |
These benefits should not be interpreted as guaranteed performance claims. Weather resistance, operating temperature range, protection features, and service intervals depend on the actual enclosure model, installed configuration, project design, and manufacturer documentation.
SuiRui Pro Tip: I treat the checklist as a responsibility map. If a line item needs an electrician, structural engineer, AV technician, or client representative, I write that clearly before commissioning day instead of discovering it during sign-off.
How to maintain an outdoor projector enclosure installation?
Maintaining an outdoor projector enclosure installation means preserving the same conditions verified at commissioning: seals remain intact, cable entries stay tight, airflow is unobstructed, cooling or heating devices operate as configured, sensors are readable, drainage remains clear where fitted, and optical alignment is not affected by vibration, service work, or environmental change.
Video Guide: TExplore our outdoor projector enclosure, featuring waterproof, dustproof, and corrosion-resistant protection.
Maintenance Checks After Handover
Maintenance should be based on the specific enclosure manual, projector manual, installed accessories, site exposure, and project operating schedule. Do not assume that every enclosure includes the same fan, air-conditioner, heater, drain, filter, thermostat, or remote-monitoring function.
Recommended maintenance categories include:
- Mechanical condition
- Inspect brackets, visible fixings, door hinges, locks, and service panels.
- Check for vibration, deformation, corrosion, loose components, or impact damage.
- Confirm that access doors still open fully and that the projector removal path has not been blocked by later site work.
- Sealing and cable entry
- Inspect door gaskets, viewing-window seals, cable glands, and unused opening plugs.
- Check whether cables remain properly fixed and free from excessive tension.
- Confirm that drip-loop arrangements, if used, remain correctly positioned.
- Cooling and environmental control
- Check intake and exhaust paths for blockage.
- Inspect configured fans, air-conditioning units, heaters, sensors, filters, or drainage components only if they are part of the actual installed system.
- Record measurement-point locations when logging temperature and humidity.
- Optical condition
- Clean optical windows only according to manufacturer-approved methods.
- Check image focus, alignment, edge clipping, and reflections after the enclosure is returned to normal closed operation.
- For multi-projector systems, verify blending or overlap only where such functions are part of the project.
- Records and trend review
- Keep service dates, observations, measurements, corrective actions, and retest results.
- Compare current readings with previous records, but do not create universal pass/fail limits unless they are defined by the equipment manuals or approved project requirements.
SuiRui Pro Tip: I ask maintenance teams to photograph measurement points, cable entries, and door seals during the first service visit. Those photos become a baseline for later inspections and help avoid arguments about whether a condition has changed.
What is the price of outdoor projector enclosure installation?
The price of outdoor projector enclosure installation depends on the enclosure type, cooling configuration, bracket design, site access, electrical scope, cable-entry requirements, number of projectors, environmental exposure, and commissioning documentation. A reliable quotation needs actual projector and lens details, installation drawings, and the required acceptance process before pricing is finalized.
Video Guide: Follow this eight-step guide to pole installation for outdoor projection systems.
Pricing Inputs to Confirm Before Quotation
A professional quotation should separate product supply, mechanical installation, electrical work, commissioning, documentation, and any special access requirements. The goal is not to produce a generic price, but to identify what information is needed for a credible project estimate.
Based on our internal data and market analysis, here is the breakdown:
| Cost Factor | What Must Be Confirmed | Price Impact |
|---|---|---|
| Projector and lens | Model, dimensions, weight, lens length, heat output information from manufacturer documents, installation orientation | Affects enclosure compatibility, bracket design, optical window position, and cooling selection |
| Enclosure configuration | Model, size, material, cooling type, access method, monitoring options if specified | Affects equipment cost, installation labor, and commissioning scope |
| Mounting method | Wall, pole, truss, platform, rooftop, façade, or custom structure | Affects structural review, bracket fabrication, lifting/access method, and safety planning |
| Environmental exposure | Rain direction, dust, temperature range, sun exposure, wind, salt air, public access | Affects enclosure selection, sealing details, protection strategy, and maintenance plan |
| Cable entry and power | Cable quantity, cable diameter, gland type, separation of circuits, grounding, protection devices | Affects labor, materials, electrical coordination, and inspection requirements |
| Commissioning scope | Test duration, measurement points, monitoring verification, report format, witness testing | Affects technician time and documentation effort |
| Handover requirements | Photos, as-built records, punch list, retest records, maintenance instructions, sign-off forms | Affects project administration and closeout time |
No universal price should be treated as valid without the actual project details. SuiRui can discuss adaptation requirements more effectively when the project team provides the projector model, lens model, device quantity, intended mounting method, and site environmental conditions.
SuiRui Pro Tip: I recommend asking for a quotation in sections: enclosure supply, mounting hardware, installation labor, electrical work, commissioning, and documentation. This makes it easier to compare proposals without hiding critical scope differences.
Key Features & Comparison
A projector enclosure commissioning checklist should compare what is physically installed with what was approved, then verify each feature in the correct operating condition. The most important comparison is not between marketing claims, but between actual site conditions, product documentation, drawings, and measurable acceptance records.
Video Guide: Take a closer look at our outdoor projector enclosure, designed for outdoor projection installations.
Feature Comparison for Installation and Commissioning
Based on our internal data and market analysis, here is the breakdown:
| Feature / Area | Fan-Cooled Enclosure Checks | Air-Conditioned Enclosure Checks | Acceptance Reference |
|---|---|---|---|
| Cooling principle | Confirm designed intake and exhaust paths, fan operation if equipped, ventilation clearance, and no blocked airflow | Confirm air-conditioner installation, condensate or drainage arrangement if applicable, airflow path, and power/control requirements | Specific enclosure manual, cooling device manual, approved project design |
| Temperature monitoring | Record outdoor ambient temperature, projector intake temperature, and defined internal measurement points | Record outdoor ambient temperature, projector intake temperature, conditioned-air path, and defined internal measurement points | Approved test plan, equipment documentation |
| Humidity or condensation control | Verify only if sensors, heaters, drainage, or humidity-control features are actually installed | Verify only if the installed system includes humidity or condensate management functions | Equipment manual and project requirements |
| Cable entry | Check cable gland fit, bend radius space, strain relief, unused-hole sealing, and drip-loop design where applicable | Same checks, plus confirm that power/control cables for environmental equipment are correctly identified | Cable drawings, enclosure manual, electrical design |
| Maintenance access | Confirm access to projector, lens, filters if applicable, fans if fitted, cable connections, and service doors | Confirm access to projector, lens, air-conditioning service areas, drainage, controls, and cable entries | Installation drawings and maintenance instructions |
| Optical window | Check lens alignment, edge clipping, focus, reflections, and window cleanliness after closing the enclosure | Same checks; also confirm no airflow or condensation issue affects the window during operation | Optical design, projector manual, project display requirements |
| Alarm or monitoring features | Verify only configured alarms and notifications using manufacturer-allowed methods | Verify configured cooling, temperature, humidity, or fault alarms where provided | Monitoring manual, approved commissioning procedure |
| Site acceptance test | Closed-enclosure operation in representative approved mode; record conditions and measurements | Same, with additional cooling-system operation records if required | Projector enclosure site acceptance test plan |
Avoid assuming that all SuiRui outdoor projector housing installation projects have the same feature set. The final checklist must be edited to match the ordered enclosure, projector, cooling system, monitoring options, and project acceptance criteria.
SuiRui Pro Tip: I mark every feature as “installed,” “not installed,” or “not applicable” before commissioning. This prevents a common mistake: testing for a function that was never supplied, or forgetting to test a function that was included.
Cost & Buying Factors
Buying decisions for an outdoor projector enclosure should be driven by compatibility, installation risk, serviceability, cooling design, cable-entry planning, and acceptance documentation—not only by enclosure size or headline protection claims. The best purchasing process starts with accurate project data and ends with a checklist that the installer can actually verify on site.
Video Guide: Explore our outdoor projector enclosure with waterproof, dustproof and corrosion-resistant protection, plus heating and dehumidification.
Information Required Before Selecting an Enclosure
For a professional outdoor projector enclosure mounting and commissioning plan, the buyer should collect project information before confirming a model. Incomplete information can lead to oversized housings, blocked lens movement, poor cable access, insufficient service clearance, or unverified cooling performance.
Provide the following information when requesting technical support or a quotation:
- Project application scenario
- Projection mapping, outdoor advertising, cultural tourism, façade projection, event installation, or fixed venue use.
- Expected operating schedule and seasonal exposure.
- Public-access or restricted-access environment.
- Projector and lens details
- Projector model.
- Lens model.
- Quantity of projectors.
- Required projection orientation.
- Manufacturer installation and ventilation requirements.
- Enclosure and cooling requirements
- Proposed enclosure model if already selected.
- Actual cooling configuration required by project conditions.
- Any heater, fan, air-conditioner, sensor, drain, or monitoring option specified.
- Maintenance-access requirements.
- Installation method
- Wall, pole, platform, truss, rooftop, façade, or custom bracket.
- Available mounting surface details.
- Access method for installation and maintenance.
- Structural review responsibility.
- Electrical and cable-entry requirements
- Power supply arrangement.
- Separate circuits for projector and enclosure environmental controls if applicable.
- Cable quantity and diameter.
- Signal, power, control, and network cable paths.
- Grounding and protection requirements to be confirmed by qualified electrical personnel.
- Commissioning and acceptance
- Test date and expected site environmental conditions.
- Projector operating mode.
- Door status during test.
- Required test duration according to approved project requirements.
- Temperature and humidity measurement locations.
- Alarm and monitoring verification method.
- Required handover records.
SuiRui Pro Tip: I advise buyers not to approve an enclosure only from projector length and width. Lens position, cable bend space, service access, airflow direction, and window alignment can be just as important as the basic internal dimensions.
Conclusion
A strong outdoor projector enclosure installation process is a documented sequence: verify equipment and drawings, mount safely, seal cable entries, confirm electrical responsibilities, validate cooling and temperature monitoring, check optics with the enclosure closed, record commissioning results, and complete handover with photos, test logs, corrective actions, and signed acceptance.
Final Commissioning and Handover Guidance
Use this projector enclosure commissioning checklist as a working framework, then adapt it to the exact projector, lens, enclosure, cooling system, project drawings, and local requirements. It should not replace manufacturer manuals, approved engineering design, qualified electrical work, structural review, or site-specific safety procedures.
Common omissions to avoid:
- Unclear measurement points
- Always state whether a temperature value is outdoor ambient, projector intake, enclosure internal air, exhaust area, or another defined point.
- Open-door testing only
- A projector that operates normally with the enclosure open has not been fully verified for closed-box operation.
- Incomplete cable sealing
- Cable glands, unused openings, strain relief, bend space, and drip-loop details should be checked before final acceptance.
- Blocked maintenance space
- Door swing, filter access if applicable, cooling-device access, and projector removal paths must remain available after nearby works are completed.
- Weak handover records
- Installation photos, configuration settings, test records, unresolved items, corrective actions, and retest results should be organized before sign-off.
For further discussion with SuiRui, prepare the projector model, lens model, equipment quantity, enclosure model if known, actual cooling configuration, mounting method, site exposure conditions, and required commissioning records. This information allows a more accurate review of enclosure adaptation, installation planning, and site acceptance requirements.
SuiRui Pro Tip: I never close a project with only verbal confirmation. A good handover package should let a future technician understand what was installed, how it was tested, what was corrected, and which documents define the acceptance standard.