Most custom enclosure problems begin before production, not during production. A custom outdoor projector enclosure must be designed around the exact projector model, site climate, airflow path, lens position, mounting structure, power supply, and maintenance access. Ordering by lumens, outside dimensions, or lowest price often causes avoidable overheating, optical misalignment, installation rework, and project delays.
Video Guide: Learn how a waterproof projector box can be integrated into professional outdoor projection projects. The video introduces the enclosure structure and shows how purpose-built housing supports projection equipment used in long-term outdoor installations.
What is custom outdoor projector enclosure?
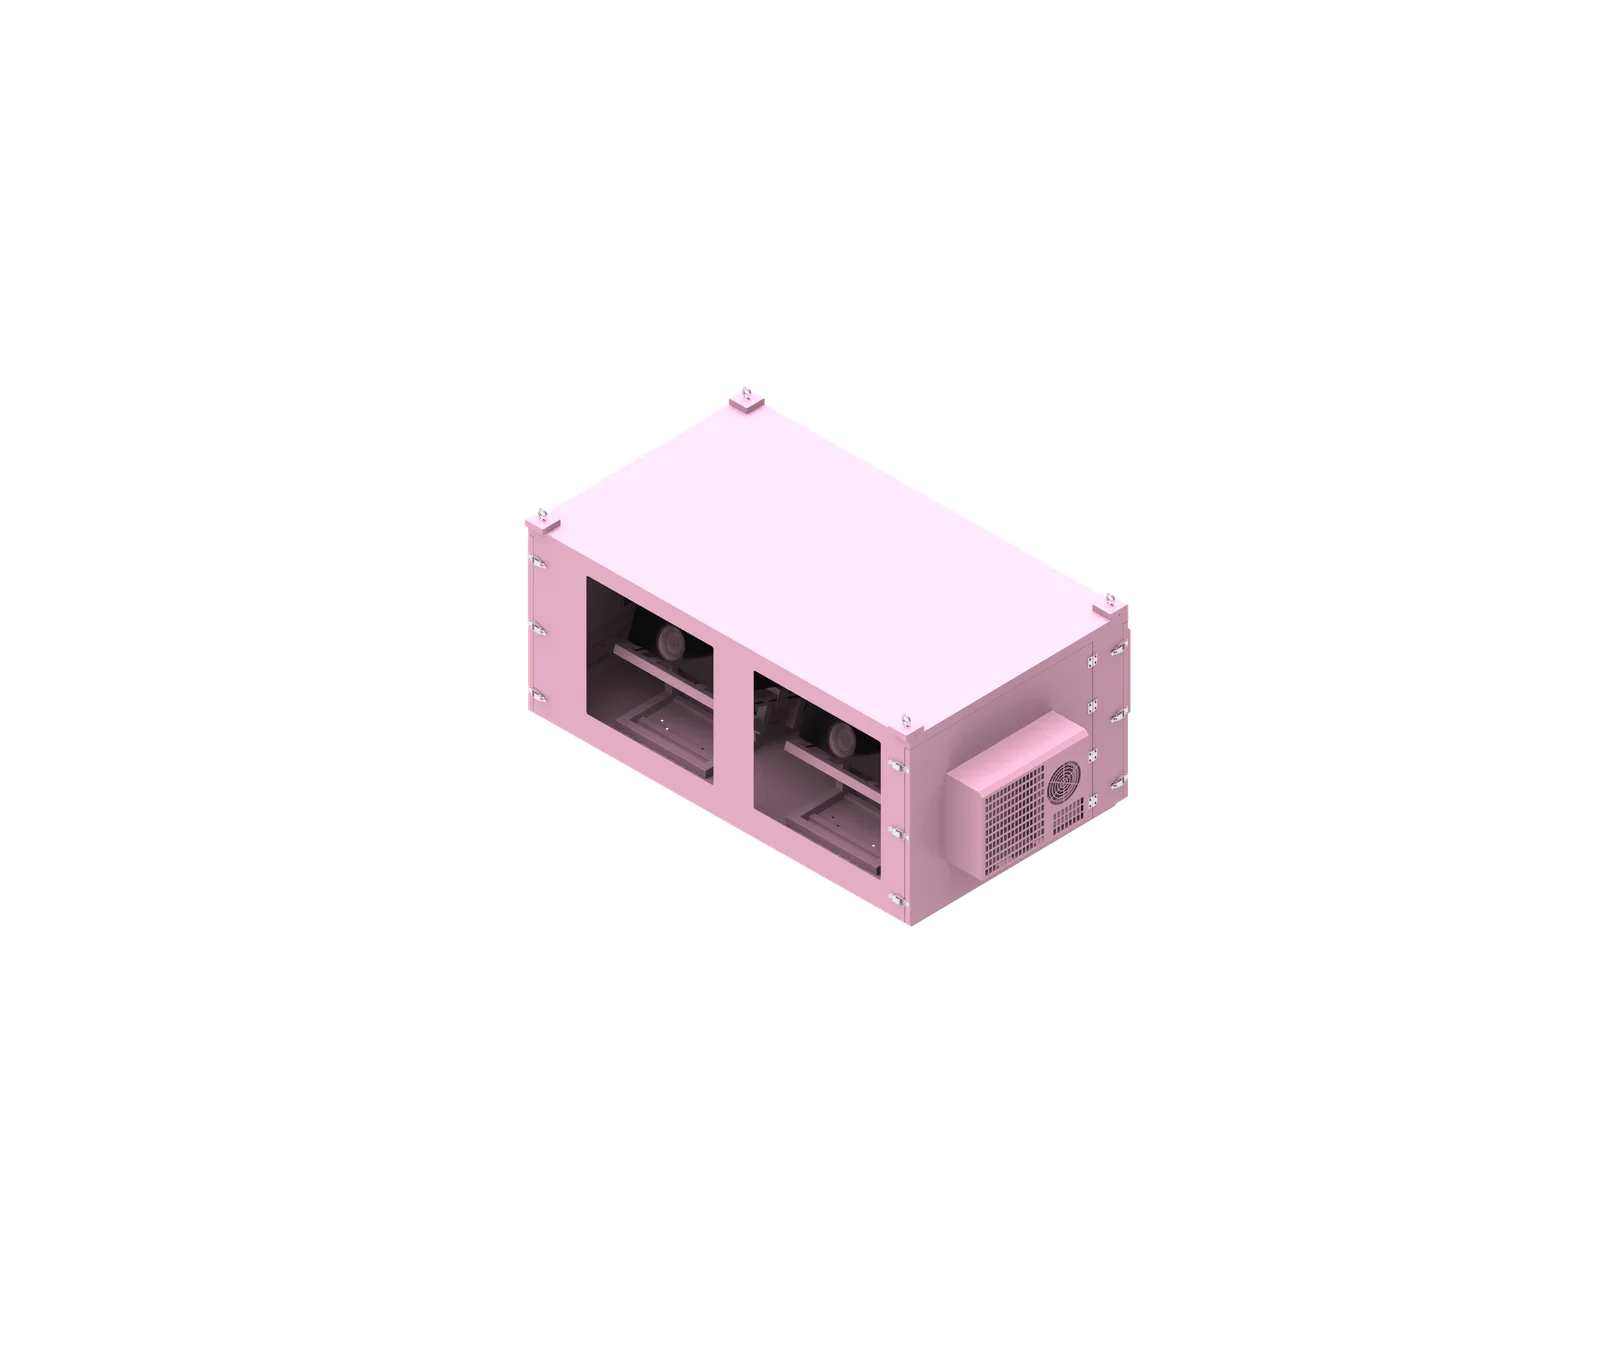
A custom outdoor projector enclosure is an engineered protective cabinet designed for a specific projector, installation site, and operating requirement. It protects the projector from rain, dust, heat, humidity, impact, and unauthorized access while maintaining correct airflow, optical alignment, electrical safety, and service access for long-term outdoor use.
Video Guide: Watch the smoke test of our outdoor projector enclosure and see how the enclosure design is evaluated during product testing. This video provides a closer look at smoke movement and airflow paths, offering a practical reference for professional outdoor projection applications.
Engineered Protection Around the Actual Projector
A custom projector enclosure is not simply a metal box that is slightly larger than the projector. From a manufacturing perspective, the enclosure must be designed around the projector’s full technical profile, including dimensions, weight, heat load, lens geometry, airflow direction, cable interfaces, and mounting method.
One of the most common outdoor projector enclosure mistakes is requesting only a “10,000-lumen projector enclosure” or “20,000-lumen outdoor projector box.” Brightness does not define enclosure compatibility. Two projectors with similar brightness can have completely different cooling paths, lens positions, power consumption, and service requirements.
A proper projector enclosure ordering guide should begin with these project-specific details:
- Exact projector brand and model
- Projector quantity and arrangement
- Projector dimensions and weight
- Power consumption and heat load
- Air intake and exhaust positions
- Lens model, lens center, and projection angle
- Installation method, such as pole, wall, rooftop, truss, or ground support
- Maximum and minimum ambient temperature
- Humidity, salt spray, dust, and direct sunlight exposure
- Required IP rating and sealing configuration
- Power supply, cable entry, and control requirements
ShiRui Pro Tip: When we review a custom projector enclosure inquiry, the first thing I want is the projector datasheet and site condition. If those two items are missing, any enclosure recommendation is only a rough assumption, not an engineering decision.
How Does custom outdoor projector enclosure Work?
A custom outdoor projector enclosure works by combining weather sealing, controlled ventilation or cooling, optical window positioning, internal mounting, cable protection, and service access. Its purpose is to preserve the projector’s original operating conditions while adapting it for rain, sunlight, temperature changes, humidity, and outdoor installation loads.
Video Guide: See how an outdoor enclosure for projector applications provides a dedicated housing solution for professional projection equipment. This video presents the enclosure structure and shows how it can be integrated into permanent outdoor projection projects and different installation environments.
Weatherproofing, Cooling, and Optical Alignment Working Together
The enclosure must manage three engineering requirements at the same time: environmental protection, thermal control, and projection accuracy. If one area is ignored, the entire system can fail even if the cabinet looks well built.
A sealed box may protect against rain but trap heat. A highly ventilated box may cool the projector but allow dust or moisture inside. A strong cabinet may still be unusable if the optical window is in the wrong position or blocks lens shift.
The working process usually includes:
- Projector mounting
The projector is fixed to an internal bracket or platform that supports its weight and allows proper positioning. - Airflow management
The enclosure design must respect the projector’s original intake and exhaust direction. Hot exhaust air must not recirculate into the intake. - Thermal control
Depending on projector heat load and climate, the enclosure may use fans, filters, industrial air conditioning, heaters, or combined heating and cooling. - Weather sealing
Doors, cable glands, optical windows, access panels, and cooling interfaces must be sealed according to the project’s required protection level. - Optical window alignment
The window must match the lens model, lens shift range, projection angle, and adjustment clearance. - Electrical and cable routing
Power, HDMI, fiber, Ethernet, control, and sensor cables must enter without interfering with airflow, waterproofing, or maintenance. - Maintenance access
Technicians must be able to remove the projector, adjust the lens, clean the window, inspect cooling components, and replace parts.
ShiRui Pro Tip: Do not treat IP rating and cooling as separate topics. Every fan, cable gland, air conditioner, access door, and window affects the enclosure’s real outdoor performance.
What to look for when buying an outdoor projector?
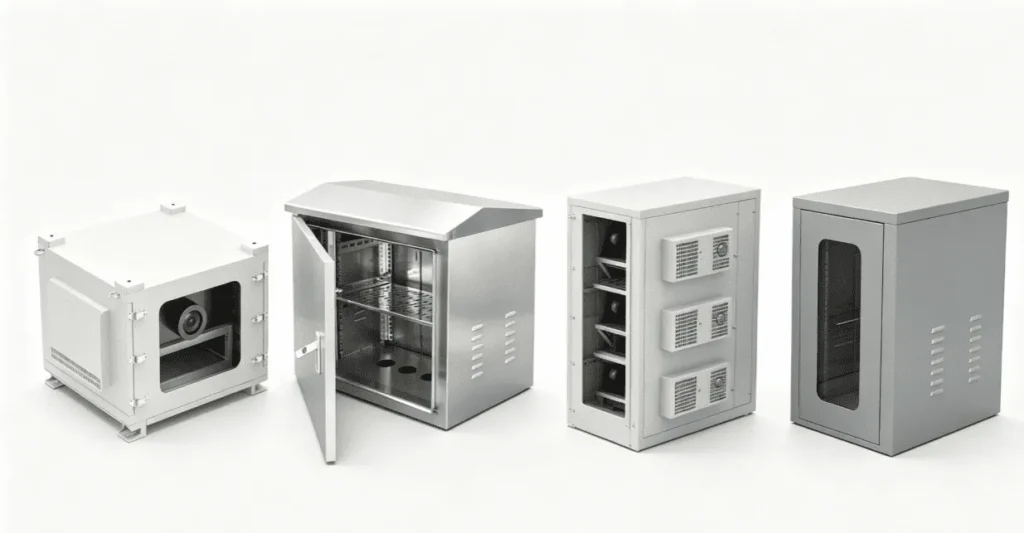
When buying an outdoor projector for enclosure use, look beyond brightness. Confirm the exact model, dimensions, weight, power consumption, heat output, airflow direction, lens options, mounting holes, cable interfaces, and manufacturer-required clearances. The best projector is one that can be safely cooled, aligned, installed, and serviced outdoors.
Projector Selection Criteria That Affect Enclosure Design
A projector that performs well indoors may create problems inside an outdoor enclosure if its airflow, lens position, or service access is difficult to accommodate. Buyers often select a projector first by lumens, then ask an outdoor projector enclosure manufacturer to “make a suitable box.” That approach can work only if the complete technical data is provided before design.
The biggest mistake is assuming lumen output equals thermal demand. In reality, power consumption and cooling architecture are more important for enclosure engineering. A compact high-power projector can be more difficult to cool than a larger unit with a better airflow layout.
Based on our internal data and market analysis, here is the breakdown:
| Buying Factor | Why It Matters for Enclosure Design | Common Mistake |
|---|---|---|
| Brightness | Affects projection result, not enclosure fit by itself | Ordering only by lumen rating |
| Power consumption | Helps estimate heat load | Ignoring electrical and thermal demand |
| Air intake and exhaust | Determines internal airflow layout | Blocking vents or recirculating hot air |
| Lens model | Affects optical window size and position | Providing projector body size only |
| Lens shift | Requires extra optical clearance | Designing a window too small |
| Weight | Affects mounting structure and center of gravity | Underestimating total installed load |
| Cable interfaces | Determines gland type and entry location | Forgetting connector size and cable direction |
| Service access | Affects door layout and internal clearance | Making the cabinet too tight |
ShiRui Pro Tip: Before selecting a projector for an outdoor project, ask whether the projector can be maintained after installation. If technicians cannot reach the lens, cables, filters, or mounting points, the enclosure design will become much more complicated.
What is the best outdoor waterproof projector box?
The best outdoor waterproof projector box is not a universal product; it is the enclosure configuration that matches the projector, climate, IP requirement, airflow path, lens position, mounting method, and maintenance plan. A well-designed custom projector enclosure balances waterproofing, heat control, condensation management, structural strength, and usability.
Why “Waterproof” Alone Is Not Enough
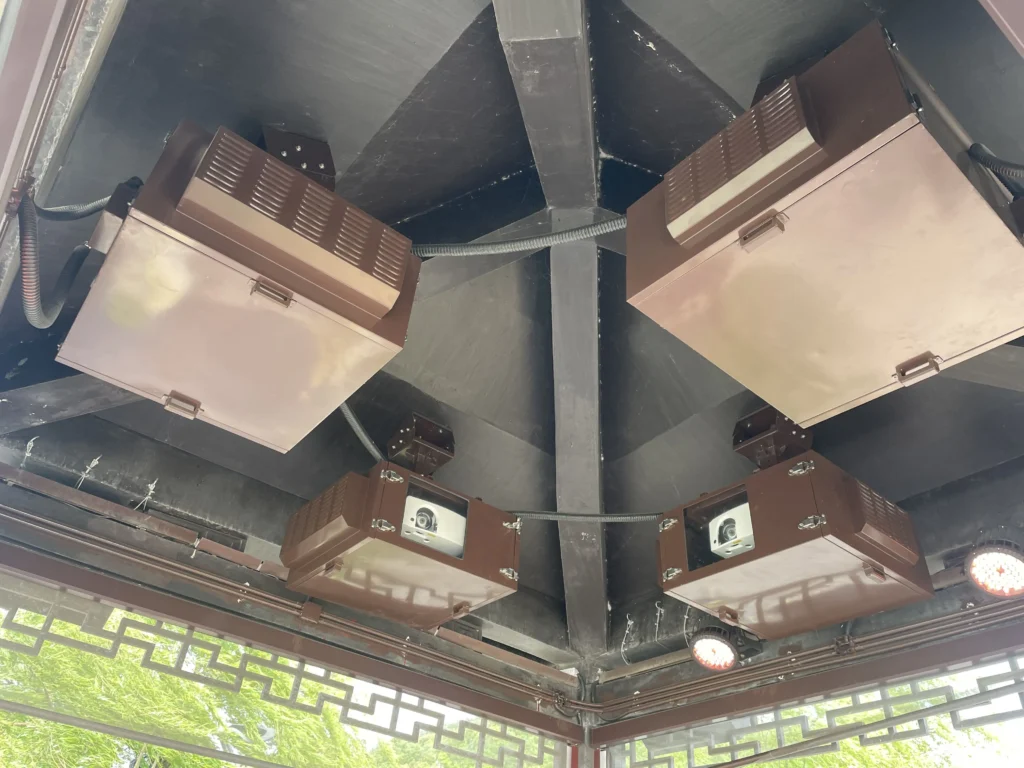
Many buyers focus on waterproofing as if rain protection is the only requirement. In practice, outdoor projector protection includes rain, dust, heat, humidity, corrosion, condensation, sunlight, and service access. A cabinet can be waterproof but still fail because the projector overheats or moisture condenses inside.
Another common misunderstanding is assuming that IP65 automatically protects every configuration. The actual performance depends on the specific structure: door seals, cable glands, optical window sealing, cooling interfaces, access panels, drainage, and installation method.
For a waterproof projector box, the following points should be confirmed before production:
- Required IP rating and whether it applies to the full assembled configuration
- Optical window sealing method
- Door gasket and locking structure
- Cable gland type, quantity, and position
- Cooling system interface sealing
- Drainage and condensation-control strategy
- Corrosion resistance for coastal or humid locations
- Maintenance process after installation
- Mounting method and exposure direction
- Direct sunlight and shading conditions
Waterproofing should also be considered together with condensation. Outdoor temperature changes can cause moisture to form inside the enclosure, especially in coastal areas, humid climates, and sites with large day-night temperature differences.
ShiRui Pro Tip: If a buyer asks only for “waterproof,” I always ask about humidity and temperature swing next. Keeping rain out is only one part of outdoor protection; controlling internal moisture is just as important.
What are the key factors to consider when buying a projector?
The key buying factors are projector model, power consumption, airflow layout, lens configuration, mounting method, operating environment, and serviceability. For enclosure projects, the projector should not be evaluated only by image performance. It must also be compatible with thermal design, optical window placement, structural support, and outdoor maintenance.
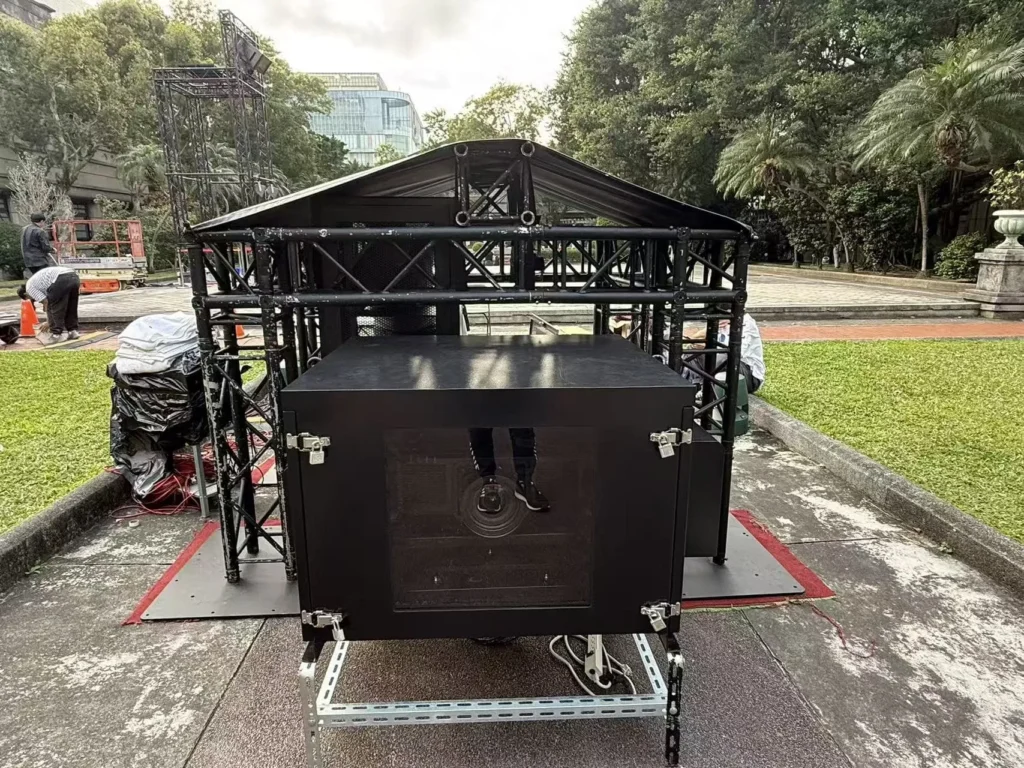
Technical Factors That Prevent Ordering Mistakes
For AV integrators, projection contractors, and engineering companies, the projector is part of a larger outdoor system. A wrong assumption at the projector selection stage can affect the enclosure, mounting frame, cooling system, optical window, wiring, and installation schedule.
The most important factors can be grouped into engineering categories:
- Projector identity
Confirm the exact brand and model before enclosure production. A later projector change may affect dimensions, mounting holes, airflow, cooling capacity, lens position, and cable routing. - Thermal load
Provide power consumption, projector quantity, ambient temperature, operating hours, and direct sunlight exposure. Cooling should not be selected only by cabinet size. - Airflow direction
Identify intake and exhaust locations. Hot exhaust air must not return to the projector intake, and multi-projector systems need separate airflow planning. - Lens and projection geometry
Confirm lens model, lens center, projection angle, lens shift, and adjustment range. This is critical for projection mapping and multi-projector blending. - Installation structure
Define whether the enclosure is pole-mounted, wall-mounted, rooftop-mounted, truss-mounted, or installed on a platform. Total load and center of gravity must be considered. - Electrical and signal interface
Confirm voltage, frequency, phase requirements where applicable, cable quantity, connector size, and cable entry direction. - Maintenance access
Plan how technicians will remove the projector, clean the window, connect cables, replace fans or filters, and inspect cooling equipment.
ShiRui Pro Tip: A projector enclosure project should be frozen only after the projector model is frozen. If the projector changes, the enclosure drawing should be reviewed again before production continues.
Key Features & Comparison
A high-quality custom outdoor projector enclosure should include matched internal dimensions, correct airflow design, suitable cooling or heating, sealed optical window, protected cable entry, strong mounting interfaces, corrosion-resistant material, and practical maintenance access. The best feature set depends on projector heat load, site climate, installation method, and project risk.
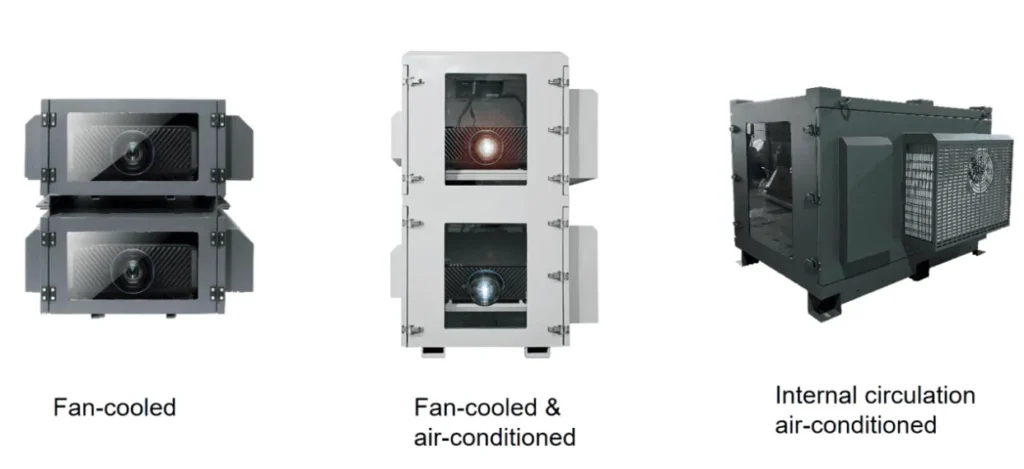
Feature Comparison for Engineering-Based Selection
Based on our internal data and market analysis, here is the breakdown:
| Feature | Standard Enclosure Approach | Custom Engineering Approach | Mistake It Helps Avoid |
|---|---|---|---|
| Projector fit | Based mainly on cabinet size | Designed around exact projector model | Size and mounting mismatch |
| Cooling | General fan or cabinet-size estimate | Based on heat load, airflow, climate, and operating hours | Overheating or over-specification |
| Airflow path | Basic ventilation openings | Intake and exhaust aligned with projector design | Hot air recirculation |
| Optical window | Fixed or generic position | Matched to lens model, lens shift, and projection angle | Image obstruction or misalignment |
| Weather protection | General waterproof structure | Seals, glands, window, cooling interface, and access panels reviewed together | False confidence in IP rating |
| Condensation control | Often not considered | Evaluated by humidity, temperature swing, and exposure | Internal moisture problems |
| Cable entry | Predefined location | Designed by cable quantity, diameter, connector, and direction | On-site drilling or rework |
| Mounting interface | Basic bracket or feet | Designed for load, center of gravity, and installation method | Structural risk |
| Maintenance access | Limited door access | Planned for projector removal, lens adjustment, and component replacement | Difficult servicing |
| Drawing confirmation | Sometimes skipped | Required before production | Manufacturing mismatch |
The key features should not be selected as a checklist of expensive options. For example, stainless steel may be necessary in a coastal salt-spray environment, but it may be unnecessary for another site where coated galvanized steel or aluminum is more suitable. Similarly, industrial air conditioning may be required for high-heat-load projectors in hot climates, while some lower-load projects may use a different thermal strategy.
The goal is not to maximize specification; the goal is to match specification to the actual project.
ShiRui Pro Tip: I recommend reviewing the enclosure drawing as carefully as the projector specification. Check the lens window, cable entry, door swing, mounting holes, cooling unit position, and internal clearance before approving production.
Cost & Buying Factors
The cost of a custom outdoor projector enclosure depends on projector size, quantity, cooling system, material, IP requirement, optical window design, mounting structure, electrical configuration, surface treatment, and customization level. Buyers should evaluate total project cost, not only cabinet price, because poor specification can lead to costly rework.
Cost Drivers That Matter More Than the Cabinet Price
A lower enclosure price is not always a lower project cost. If the cabinet later requires field modification, additional cooling, new brackets, optical window changes, cable-entry rework, or replacement parts, the total cost can increase significantly.
For this reason, cost should be evaluated together with technical risk. A reliable quotation from an outdoor projector enclosure manufacturer usually requires enough project information to define structure, thermal design, material, electrical components, and installation requirements.
Based on our internal data and market analysis, here is the breakdown:
| Buying Factor | Cost Impact | Engineering Risk if Ignored |
|---|---|---|
| Exact projector model | High | Wrong internal layout or airflow |
| Projector quantity | High | Incorrect cabinet size and cooling load |
| Cooling method | High | Overheating or unnecessary specification |
| Material selection | Medium to high | Corrosion, excess weight, or over-budget design |
| IP requirement | Medium to high | Incomplete sealing or wrong configuration |
| Lens window design | Medium | Projection blockage or misalignment |
| Mounting method | Medium to high | Structural weakness or installation difficulty |
| Cable and power design | Medium | On-site electrical and signal rework |
| Maintenance access | Medium | Higher service labor and downtime |
| Shipping size and weight | Medium to high | Unexpected logistics and handling issues |
Buyers should also confirm packing dimensions, gross weight, lifting requirements, and shipping method for large enclosures. Multi-projector cabinets can be heavy and may require special handling, reinforced packaging, or installation equipment.
A practical buying process is:
- Confirm project requirements.
- Finalize the exact projector model.
- Provide projector datasheet and lens details.
- Confirm climate and installation site.
- Define mounting method and structural interface.
- Evaluate thermal requirements.
- Review enclosure design and technical drawing.
- Approve production only after key details are confirmed.
- Complete assembly, inspection, and shipment planning.
ShiRui Pro Tip: If a quotation is based only on projector brightness and rough cabinet dimensions, treat it as preliminary. For production, I need the projector model, airflow, lens, climate, mounting, and power information confirmed.
Conclusion
A successful custom outdoor projector enclosure project starts with complete technical information. Most problems can be prevented before production by confirming the projector model, airflow, thermal load, climate, lens position, mounting structure, power supply, cable entry, maintenance access, and drawings. Careful preparation reduces redesign, installation delays, and avoidable rework.
Final Ordering Checklist for Buyers and Integrators
Before placing an order for a custom outdoor projector enclosure, prepare a complete technical package instead of sending only lumen output or external projector dimensions. This helps the manufacturer design the enclosure around real operating conditions rather than assumptions.
Use this checklist before requesting production:
- Projector brand and exact model
- Projector datasheet
- Number of projectors
- Projector dimensions and weight
- Power consumption
- Lens model and lens center position
- Lens shift and projection angle requirements
- Air intake and exhaust positions
- Manufacturer-required ventilation clearance
- Maximum and minimum ambient temperature
- Humidity, dust, salt spray, or coastal exposure
- Direct sunlight conditions
- Daily operating hours
- Required IP rating
- Installation method and mounting structure
- Site photos or installation drawings for complex projects
- Cable quantity, diameter, connector size, and entry direction
- Voltage, frequency, and phase requirements where applicable
- Maintenance access requirements
- Shipping destination, packing limits, and lifting requirements
- Required quantity and delivery schedule
For complex projection mapping, rooftop, façade, pole-mounted, or multi-projector projects, site photos and structural drawings are especially useful. A multi-projector enclosure is not simply a larger single-projector cabinet; it requires redesigned airflow, window positions, support structure, access doors, and thermal control.
ShiRui recommends confirming all major technical requirements and approving detailed drawings before production begins. If the projector model changes after drawing approval, the enclosure design should be reviewed again before manufacturing continues.
ShiRui Pro Tip: The safest enclosure order is the one with the fewest assumptions. Send the projector datasheet, site conditions, lens information, and mounting details early, and we can help turn them into a practical enclosure design before production.