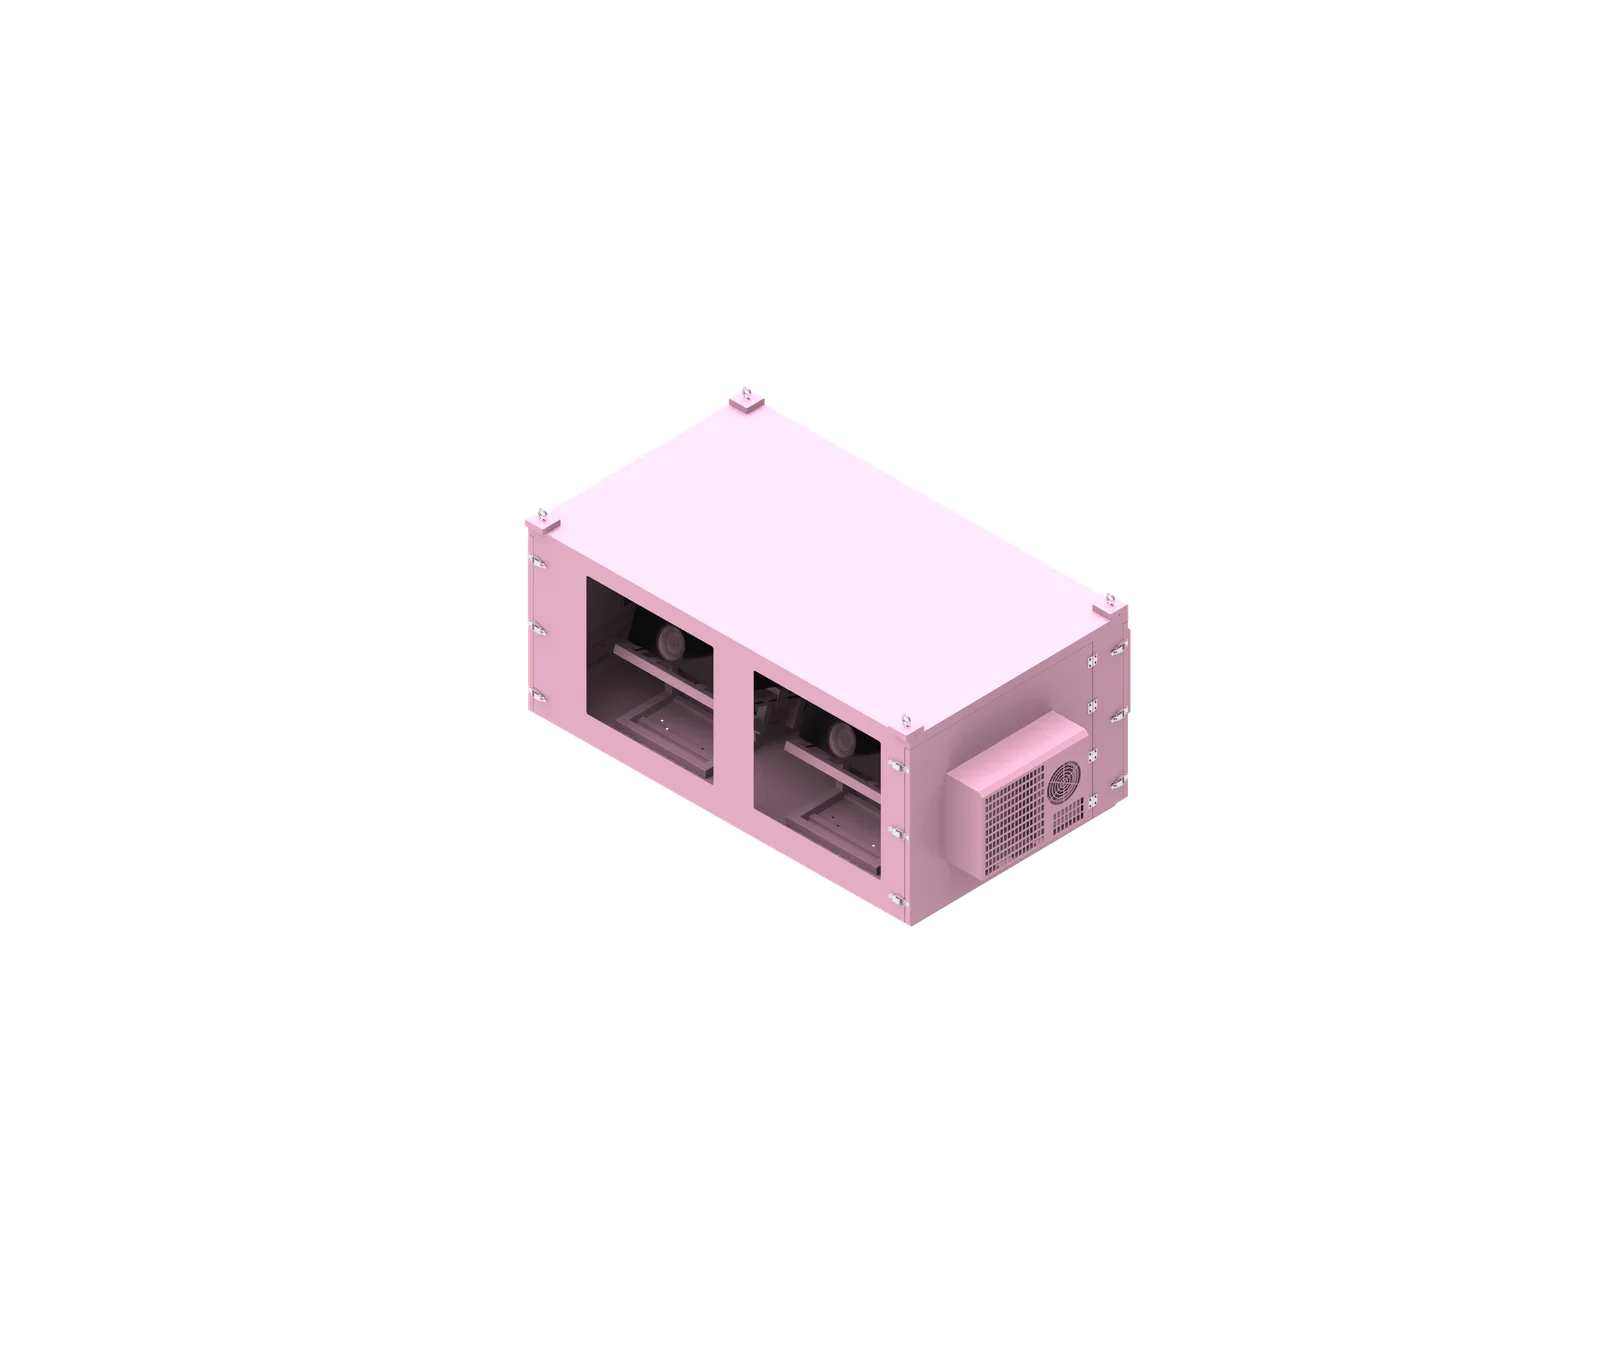
Maintenance access should be engineered before an outdoor projector enclosure is fabricated, not treated as an afterthought. A good design allows technicians to inspect, adjust, service, and remove the projector, cooling system, optical window, electrical components, and cables without unnecessary disassembly. For custom projector enclosure projects, the core rule is simple: the enclosure is not fully engineered until the maintenance path has been designed.
What is outdoor projector enclosure maintenance?
Outdoor projector enclosure maintenance is the planned inspection, adjustment, cleaning, servicing, and replacement work required to keep the projector and enclosure operating safely outdoors. It includes access to the projector, lens, optical window, cooling system, electrical controls, cable entries, seals, gaskets, and mounting structure without compromising weather protection or alignment.
Maintenance Is a Design Requirement, Not a Repair Activity
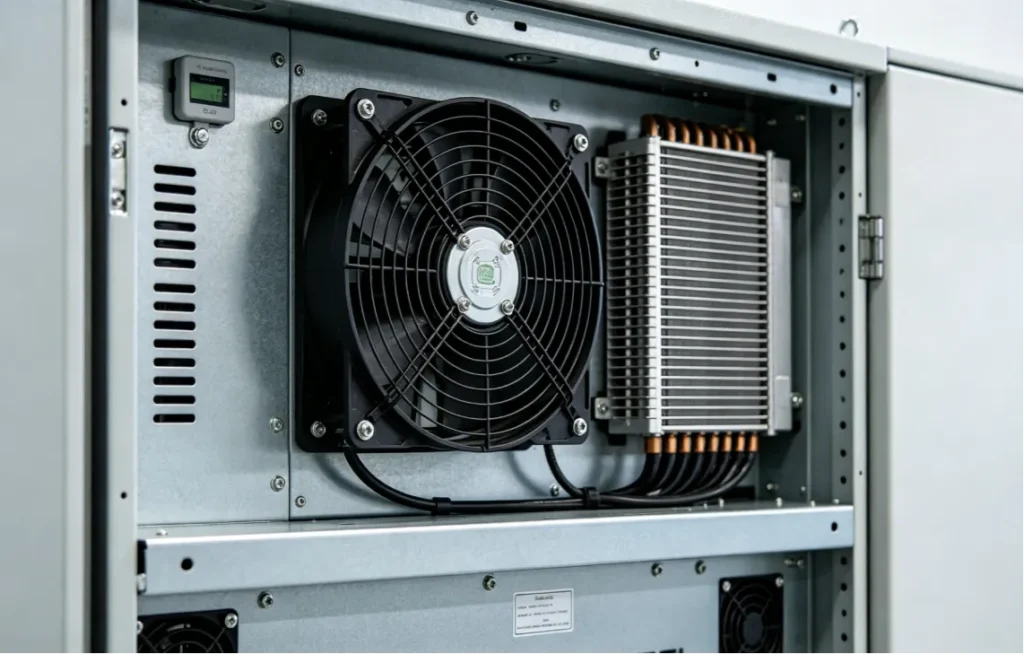
Outdoor projector enclosure maintenance starts during the design phase. If technicians cannot reach the components they need to inspect, the enclosure may work on day one but become difficult, expensive, or risky to service later.
The most common engineering mistake is designing only around whether the projector fits inside the cabinet. A projector that fits inside an enclosure is not necessarily easy to remove, adjust, reconnect, or repair. For SuiRui custom outdoor projector enclosure projects, maintenance access is reviewed together with projector model data, airflow layout, electrical layout, cable routing, mounting method, and site conditions.
Based on our internal data and market analysis, here is the breakdown:
| Maintenance Zone | Access Required |
|---|---|
| Projector | Installation, removal, inspection, and replacement |
| Lens | Focus, zoom, lens shift, projection angle, and alignment |
| Optical Window | Cleaning, gasket inspection, seal inspection, and frame access |
| Cooling System | Air conditioner, fans, filters, sensors, drains, and airflow checks |
| Electrical System | Controller, power distribution, protection devices, and sensors |
| Cable Entry | Cable glands, power cables, signal cables, network cables, and grounding |
| Mounting System | Rails, brackets, fasteners, alignment references, and support structures |
SuiRui Pro Tip: I always ask for the exact projector brand and model before discussing service-door design. Brightness and cabinet size are not enough; the lens position, airflow direction, cable ports, filter locations, and projector removal path are what determine real maintenance access.
How Does outdoor projector enclosure maintenance Work?
Outdoor projector enclosure maintenance works by giving technicians controlled access to service zones while preserving the enclosure’s waterproofing, airflow, thermal stability, and optical alignment. The design should define how doors open, how cables disconnect, how the projector is removed, and how cooling and electrical components are serviced before fabrication begins.
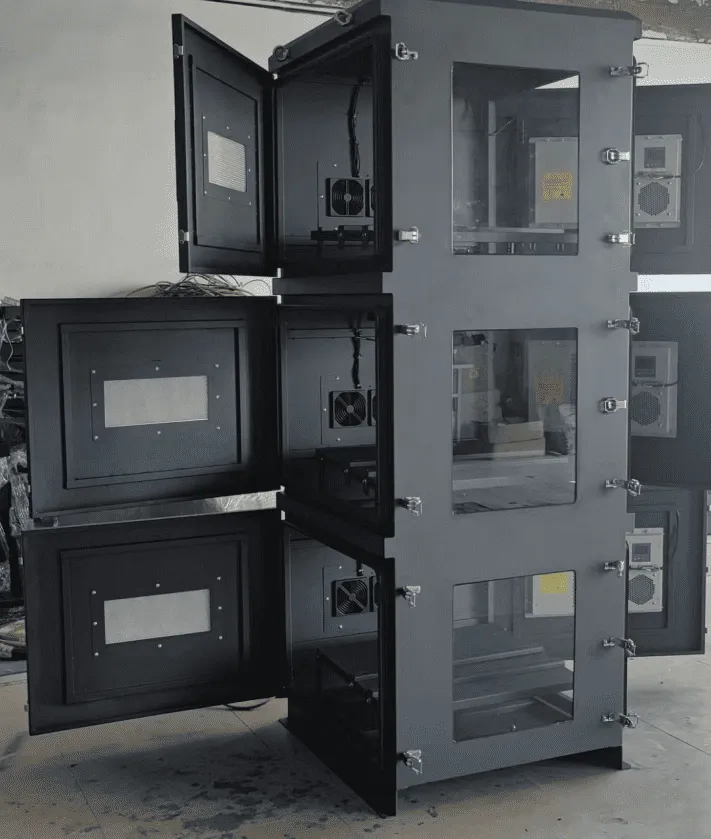
The Maintenance Path Must Be Simulated Before Production
A reliable outdoor projector enclosure design should include a complete maintenance path. This means engineers should review the exact sequence a technician will follow when opening the cabinet, disconnecting cables, accessing the projector, servicing components, and resealing the enclosure.
A recommended workflow is:
- Confirm the exact projector brand and model.
- Review projector dimensions, weight, lens position, intake, exhaust, filters, service panels, and cable ports.
- Define the installation method, such as pole-mounted, wall-mounted, rooftop, or steel-structure installation.
- Position the projector according to optical requirements.
- Design the cooling system layout around intake, exhaust, and temperature-control needs.
- Arrange the electrical system and cable-entry zone.
- Identify all components that require inspection or replacement.
- Define the projector removal direction: front, rear, side, top, or through a large service door.
- Confirm service-door size, position, opening direction, and surrounding clearance.
- Verify the complete maintenance path on the technical drawing before fabrication.
If any step is blocked by a door frame, cable route, air-conditioning unit, internal bracket, pole structure, or mounting plate, the projector enclosure maintenance access should be redesigned before sheet-metal production starts.
SuiRui Pro Tip: In our engineering reviews, I treat the maintenance path like a second installation path. If the projector can be installed but cannot be removed without major disassembly, the enclosure design is not finished.
Can the Projector Be Removed Without Dismantling the Enclosure?
A well-designed outdoor projector enclosure should allow projector removal without cutting, drilling, or dismantling major cabinet structures. The removal route must consider projector size, weight, lens projection, cables, internal brackets, cooling components, and surrounding installation space. This is especially important for custom projector enclosure projects using large professional projectors.
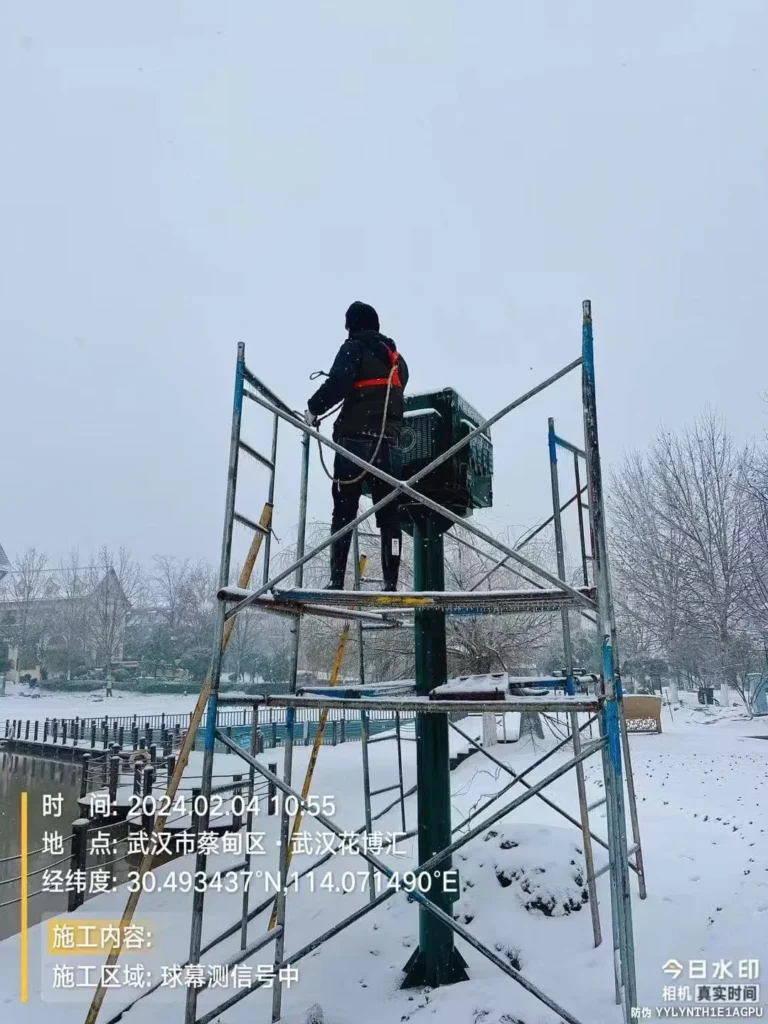
Removal Access Is the Ultimate Serviceability Test
The most practical test for projector enclosure maintenance access is a full removal simulation. Designers should not stop at checking whether the projector fits inside the box. They should verify whether a technician can remove it safely after the enclosure has been installed outdoors.
A proper removal simulation should follow this sequence:
- Open the correct service door fully.
- Reach the projector connections without obstruction.
- Disconnect power, signal, network, control, and grounding cables as required.
- Release the projector from rails, brackets, plates, or mounting hardware.
- Move the projector along the planned removal direction.
- Avoid collision with the lens, optical window frame, door opening, cable glands, fans, air conditioner, or electrical components.
- Remove or support the projector safely, considering its actual weight.
- Access cooling or electrical components if required.
- Reinstall the projector without disturbing critical alignment references.
- Close the enclosure and restore gasket compression and sealing surfaces.
For large professional projectors, removal planning may require sliding rails, removable mounting plates, support brackets, lifting access, service platforms, or external lifting equipment. These features are not required for every enclosure, but they should be considered when projector size, weight, installation height, or service frequency makes manual removal impractical.
SuiRui Pro Tip: I never assume one technician can remove a large projector by hand. For heavy projectors, the enclosure design must support the maintenance method, not force technicians to improvise on site.
What are the benefits of outdoor projector enclosure maintenance?
The main benefits of outdoor projector enclosure maintenance are lower service risk, faster troubleshooting, better projector protection, cleaner optics, safer electrical inspection, more reliable cooling, and reduced alignment disruption. Good access also helps avoid unnecessary enclosure disassembly, on-site modification, and long downtime during professional outdoor projection projects.
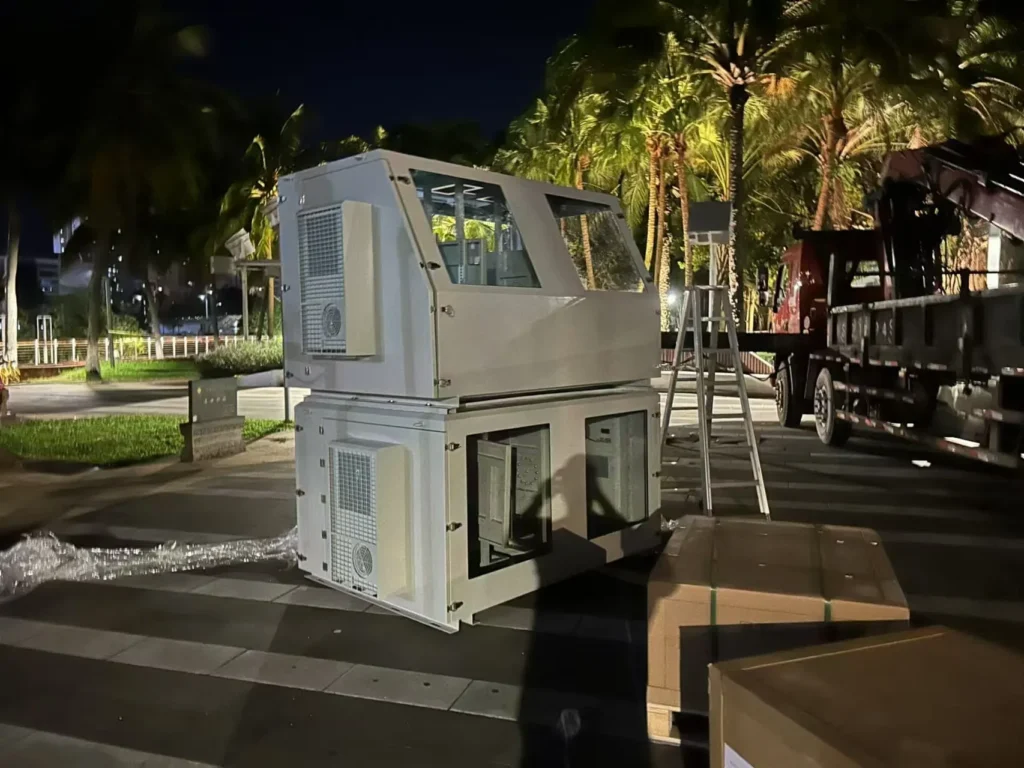
Serviceability Protects Both Equipment and Project Performance
Outdoor projection systems are often installed in locations where service is difficult: rooftops, poles, building structures, elevated platforms, event sites, or architectural façades. Poor access can turn a simple inspection into a major dismantling job.
Well-planned projector enclosure service access provides several practical advantages:
- Faster inspection: Technicians can reach the projector, lens, cooling system, and electrical components without removing unrelated parts.
- Reduced alignment disturbance: Lens and optical-window access can be designed so cleaning or adjustment does not disturb calibrated projector position.
- Safer service work: Electrical components can be placed in organized areas with practical tool clearance.
- Better cooling reliability: Fans, filters, sensors, air conditioners, intake areas, and exhaust areas can be inspected and serviced efficiently.
- Lower modification risk: Replaceable parts can be accessed without cutting, drilling, or changing the enclosure structure.
- Improved waterproofing management: Gaskets, seals, cable glands, and door compression can be inspected after repeated opening.
- Better long-term value: The enclosure remains serviceable throughout the life of the installation, not only during initial installation.
For projection mapping, multi-projector blending, long-throw projection, architectural projection, and outdoor performance projects, access design is directly connected to image quality. If technicians cannot adjust focus, zoom, lens shift, or projector angle properly, the enclosure becomes a limitation on the projection system.
SuiRui Pro Tip: The best maintenance design is the one that lets technicians solve the problem they came for without creating three new problems: water leakage, airflow blockage, or optical misalignment.
How to maintain an outdoor projector enclosure?
To maintain an outdoor projector enclosure, technicians should inspect the projector, lens, optical window, cooling system, filters, fans, electrical components, cable glands, mounting hardware, gaskets, and seals according to the actual enclosure design. Maintenance should be performed with attention to weather exposure, condensation risk, tool clearance, and resealing after service.
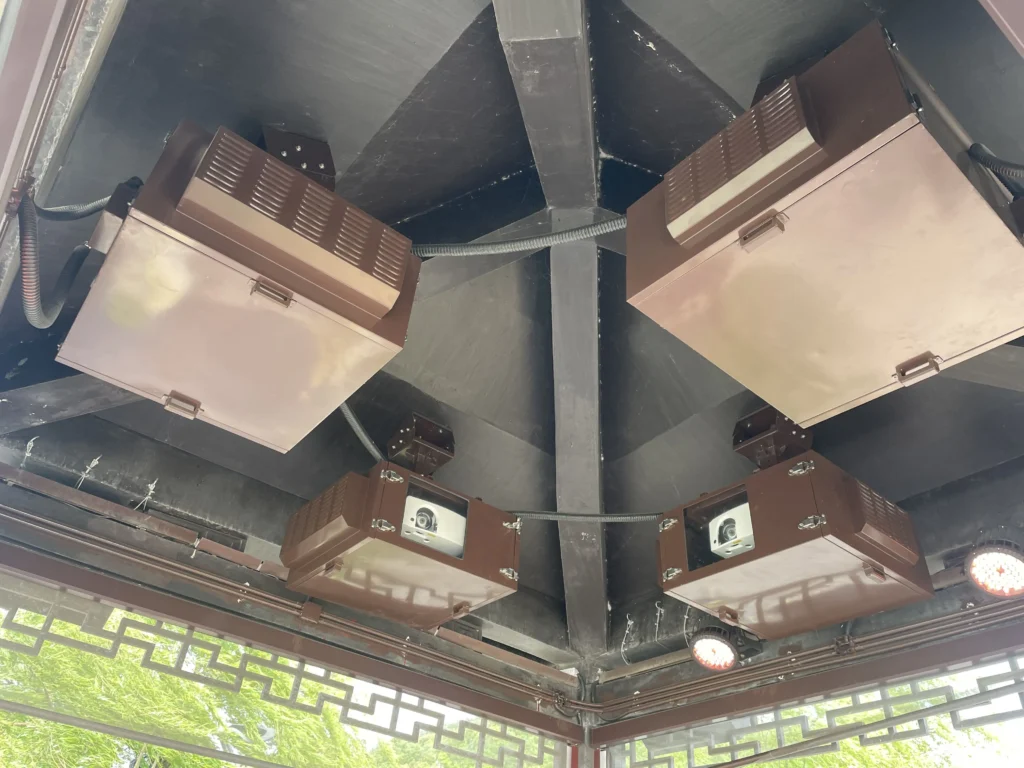
Practical Maintenance Procedure for Service Teams
Maintenance procedures should be based on the actual projector model, enclosure design, installation location, and cooling configuration. There is no universal maintenance clearance or service interval that applies to every outdoor projector enclosure.
A practical service checklist may include:
- Check site conditions before opening the enclosure. Avoid opening the cabinet during rain, heavy wind, or conditions that could expose internal components to water.
- Open the service door fully. Confirm the door can open without obstruction from walls, poles, brackets, railings, or adjacent enclosures.
- Inspect gaskets and sealing surfaces. Check door gaskets, optical-window seals, cable-entry seals, and cooling-system interfaces.
- Inspect the optical window. Clean external and internal glass surfaces where accessible, and check the frame and sealing components.
- Check lens access. Verify focus, zoom, lens shift, projector position, and projection angle as required by the project.
- Inspect cooling components. Check fans, filters, air intake areas, exhaust areas, air-conditioning components, temperature sensors, controllers, and drainage features where applicable.
- Inspect electrical components safely. Review power distribution, protection devices, controllers, sensors, internal sockets, monitoring devices, and wiring organization.
- Check cable routing. Confirm cables do not block projector removal, lens adjustment, airflow, or service openings.
- Verify mounting hardware. Inspect rails, brackets, removable plates, fasteners, and alignment references.
- Close and reseal the enclosure. Make sure doors are correctly latched and gasket compression is restored.
Opening an outdoor enclosure temporarily exposes the inside to environmental air. For temperature-controlled enclosures, technicians should follow suitable restart procedures based on humidity, temperature difference, and system design to reduce condensation risk.
SuiRui Pro Tip: I recommend checking whether cables cross the maintenance path during every design review. A cable that looks harmless on a drawing can block projector removal, fan replacement, or lens adjustment in the real enclosure.
What is the price of outdoor projector enclosure maintenance?
The price of outdoor projector enclosure maintenance depends on the enclosure size, projector type, installation height, cooling system, number of access zones, electrical complexity, site accessibility, and whether service access was designed before fabrication. Poor access usually increases labor time because technicians must remove unrelated components to reach service areas.
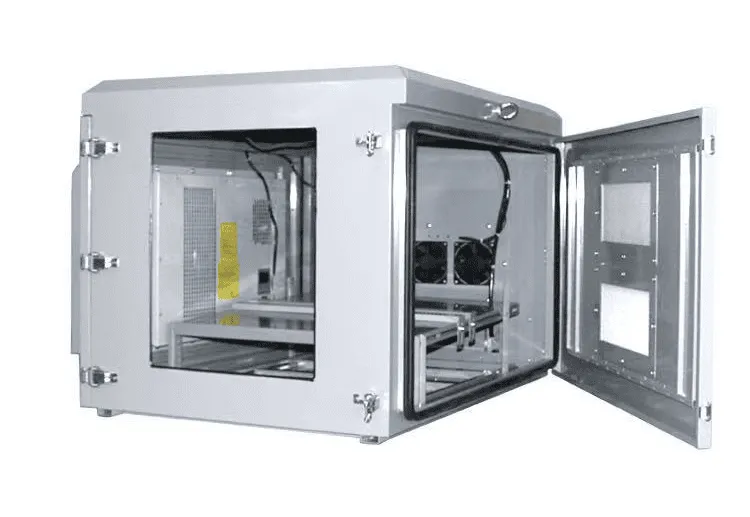
Cost Drivers Are Usually Access, Complexity, and Site Conditions
Outdoor projector enclosure maintenance cost should not be estimated only by projector brightness or cabinet dimensions. The real cost depends on how easily technicians can reach the parts that need service and how difficult the installation environment is.
Based on our internal data and market analysis, here is the breakdown:
| Cost Factor | Why It Affects Maintenance Price |
|---|---|
| Projector size and weight | Heavy projectors may require more technicians, lifting equipment, or removable support structures |
| Installation height | Rooftop, pole, and elevated steel-structure installations may need special access equipment |
| Door design | Poorly positioned or undersized doors increase disassembly time |
| Cooling configuration | Air conditioners, filters, fans, sensors, and drains require different service access |
| Electrical complexity | More controllers, power devices, sensors, and monitoring equipment increase inspection time |
| Cable routing | Cables across service paths slow down removal and create troubleshooting risk |
| Multi-projector layout | Each projector may require independent access, alignment, and cable management |
| Waterproofing condition | Damaged gaskets, seals, or cable glands may require replacement |
| Fabrication-stage planning | Access designed before production usually reduces long-term service cost |
For new custom projector enclosure projects, the best way to control future maintenance cost is to define service access before manufacturing. Retrofitting doors, moving brackets, rerouting cables, or modifying sheet metal after fabrication can be much more disruptive than designing service access correctly at the drawing stage.
SuiRui Pro Tip: When buyers ask about maintenance cost, I first ask whether the enclosure has a verified service path. If the answer is no, labor cost becomes unpredictable because every service task may require extra disassembly.
Key Features & Comparison
Key features of effective projector enclosure maintenance access include correctly sized service doors, well-positioned access zones, practical tool clearance, removable or adjustable mounting structures where needed, organized electrical areas, serviceable cooling components, protected cable routes, inspectable seals, and a verified projector removal path before fabrication.
Video Guide: TSee how a waterproof projector box can serve as a dedicated housing solution for professional outdoor projection projects. This video presents the enclosure design and its application in protecting projector equipment across permanent installations, commercial venues, and outdoor visual projects.
Comparing Maintenance-Friendly and Poor-Access Designs
A maintenance-friendly outdoor projector enclosure design is not defined by one universal door size. It is defined by whether technicians can complete real service tasks safely and efficiently while preserving waterproofing, airflow, and optical alignment.
Based on our internal data and market analysis, here is the breakdown:
| Design Area | Maintenance-Friendly Design | Poor-Access Design |
|---|---|---|
| Projector model review | Starts with exact brand, model, dimensions, weight, lens, airflow, cables, and service panels | Uses only brightness, general cabinet size, or estimated dimensions |
| Projector removal | Removal direction is defined before door design | Projector fits inside but cannot be removed easily |
| Door size | Based on actual components, tools, and removal path | Made small only to reduce opening size |
| Door position | Aligned with projector, lens, cooling, electrical, and cable service zones | Door opens to an area technicians do not need to reach |
| Multi-door layout | Used when separate service zones improve access | One door is expected to reach every component regardless of layout |
| Lens adjustment | Allows focus, zoom, lens shift, and angle adjustment with minimal disassembly | Lens controls are blocked or require major cabinet opening |
| Optical window | Internal and external glass, frame, and seals can be inspected | Cleaning or seal inspection disturbs projector alignment |
| Cooling system | Fans, filters, air conditioner, sensors, and airflow paths are accessible | Projector must be removed for normal cooling inspection |
| Electrical area | Organized for safe inspection and tool access | Electrical devices are hidden behind projector or airflow components |
| Cable routing | Avoids projector removal path and service openings | Cables cross doors, brackets, lens area, or cooling path |
| Waterproofing | Gaskets, latches, hinges, and sealing surfaces are inspectable | Repeated opening damages seals or creates uneven compression |
| Installation environment | Door swing and technician workspace are checked on site drawings | Door is blocked by wall, pole, bracket, railing, or structure |
For pole-mounted enclosures, door position should be checked against the pole, reinforcement plates, cable routing, and mounting brackets. For wall-mounted enclosures, rear access may be limited or impossible, so front, side, or bottom service access may be required. For multi-projector enclosures, technicians may need independent access to each projector without disturbing adjacent alignment.
SuiRui Pro Tip: I prefer to divide complex enclosures into maintenance zones during design. Once the optical, projector, thermal, electrical, cable-entry, and mounting zones are clear, service-door decisions become much more logical.
Cost & Buying Factors
When buying a custom outdoor projector enclosure, maintenance access should be evaluated with projector specifications, cooling requirements, installation method, environmental exposure, cable routing, and service expectations. The lowest initial enclosure cost may not be the best value if poor access increases maintenance labor, downtime, modification work, or alignment risk later.
Video Guide: Take a closer look at our waterproof projector enclosure developed for professional outdoor projection equipment. This video presents the enclosure design and its role in supporting projector protection across permanent installations and long-term outdoor applications.
What Buyers Should Confirm Before Ordering
A projector enclosure manufacturer cannot design accurate maintenance access without project-specific information. Buyers should provide complete technical details before the enclosure drawing is finalized.
Important information includes:
- Exact projector brand and model
- Projector dimensions
- Projector weight
- Lens model and lens position
- Air intake and exhaust positions
- Filter locations, if applicable
- Projector service-panel locations
- Cable connection positions
- Power, signal, network, and control cable requirements
- Projector removal direction or service preference
- Installation method: wall, pole, rooftop, platform, steel frame, or building structure
- Installation height
- Surrounding clearance and technician working space
- Cooling configuration: air conditioner, forced air, fans, filters, or other system
- Electrical-control requirements
- Environmental exposure conditions
- Site photos, drawings, or mounting structure details where available
A recommended buying workflow is:
- Confirm projector model.
- Confirm installation method.
- Define projector position.
- Design cooling-system layout.
- Design electrical layout.
- Plan cable routing.
- Identify all service components.
- Define maintenance zones.
- Determine projector removal path.
- Design service-door positions and sizes.
- Verify surrounding clearance.
- Approve technical drawings.
- Begin fabrication.
For SuiRui custom projector enclosure projects, this workflow helps prevent one of the most expensive design problems: discovering after fabrication that the projector, air conditioner, cables, or service panels cannot be accessed correctly.
SuiRui Pro Tip: Before approving drawings, I recommend buyers ask one simple question: “Can a technician remove the projector and service the cooling system without dismantling the enclosure?” If the answer is unclear, the design needs another review.
Conclusion
Good outdoor projector enclosure maintenance access allows technicians to service the projector, optical window, cooling system, electrical components, cables, seals, and mounting structure without unnecessary disassembly or on-site modification. For custom designs, maintenance requirements should be confirmed with projector dimensions, airflow, mounting method, and environmental conditions before fabrication begins.
Maintenance Access Completes the Engineering Design
A projector enclosure is not fully engineered until the maintenance path has been designed. This principle is especially important for outdoor installations, where waterproofing, airflow, optical alignment, cable routing, and technician safety must work together.
The best projector enclosure maintenance access is created by answering practical service questions early:
- Can the projector be removed without dismantling the enclosure?
- Can the lens be adjusted without disturbing major structures?
- Can the optical window be cleaned and inspected?
- Can fans, filters, air-conditioning components, sensors, and controllers be serviced?
- Can electrical components be inspected safely?
- Can cables be disconnected without blocking the removal path?
- Can the door open fully in the real installation environment?
- Can gaskets, latches, hinges, and sealing surfaces be inspected after repeated use?
For professional outdoor projection, enclosure design should never stop at “the projector fits.” The better question is whether the projector, thermal-management system, electrical system, and optical components can be maintained throughout the life of the project.
If you are planning a custom outdoor projector enclosure, SuiRui can help review projector model data, installation conditions, cooling requirements, service zones, and maintenance-access drawings before fabrication, reducing long-term service risk and improving project reliability.
SuiRui Pro Tip: My final drawing check is always maintenance-focused: if future technicians can open, inspect, adjust, remove, reinstall, realign, and reseal the system without unnecessary work, the enclosure is ready for production.